How To Create Map in ArcGIS Pro

How To Create Map in ArcGIS Pro

GIS involves utilization of tools in the GIS software to manage and analyze geographic(spatial) data. It mostly involves collection of data, processing and interpretation with an aim of creating maps. Other than possessing problem solving, team work, excellent communication and strong analytical skills; GIS Analysts must have knowledge of some basic geoprocessing tools. Geoprocessing tools are very essential when one wants to execute a certain analysis using the GIS software such ArcGIS Pro.

Map making mostly involves defining the core theme of the plan, defining type of map chosen to convey the theme, detecting the target audience and framing the finest way to organize, merge and configure the features to efficiently communicate the map’s intended message.

Map making in ArcGIS Pro involves five steps, namely:

  1. Preparation
  2. Mapping
  3. Labelling
  4. Layout
  5. Proof checking

To minimize errors, the analyst must follow these steps chronologically without skipping any step.


Step One: Preparation

This is the most important in map making as it lays the foundation on the kind of output(map) that will be generated. It gives a room for the analyst to decide:Where they are going to map? What kind of scale and extend they will apply? Setting and choosing appropriate zone and coordinate system.

Firstly, Start the Software (ArcGIS Pro) and sign in. Move the cursor to the start page and click open another project, create a new layout guided by the chosen dimensions hence printing won’t be problematic. To do this, move the cursor to “new layout icon”, click and navigate to your desired size to be printed. Secondly, the empty map should be added to the layout and setting its position and size. The next step involves activation, panning and zooming of the map to desired extent and scale. To activate, in the contents pane, right click the map frame and click activate.

In addition, open the map properties and apply the set scale as a reference scale, insert a layer template, save the edits and close the map activation. Final step preparation stage involves downloading data enclosed by the defined extent and scale: and noting down the source of the data for later reference.

Move the cursor on the ribbon and click view, click reset panes and choose reset panes for mapping. This will make sure catalog and contents panes remain open.  In the content pane, right click layout and click properties. On the layout properties icon, click general tab and makes the desired changes by renaming it.

Guides are useful in aligning elements on the layout. To add guidelines, right click the ruler ribbon and click add guides. In the guides dialog box, navigate to orientation and choose both. Navigate again to placement drop down arrow choose offset from edge. Choose your desired value in the margin box and click Ok.
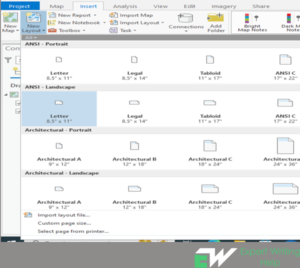
how to create map using ArcGIS Pro
Image 1: Showing the process of choosing a desired layout.


Step Two: Mapping

This step involves adding data into the map as well as removing the unwanted layers as you merge the datasets into a single layer. It is also in this stage that will determine whether you have all the required or need some more datasets. Definition queries can be used to filter out the unwanted data to be displayed on the map.

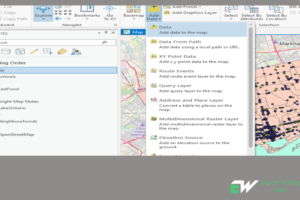
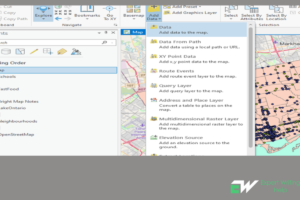
Before adding data to the map, its important to consider the purpose of the map, the accuracy of the data in relation to the message to be conveyed, how dense the dataset is and the age of the data. To add data, move the cursor the “add data” icon, expand and click “add data to the map” > move to where you have saved your data, select the required datasets and click Ok for them to be added in the map as shown in the image 2 &3 below.
ArcGIS Pro Map layout
Image 2: Showing the location of the datasets to be added in the map.
Image 3: Showing how data is added in the map

The next move will be to create/make a new geodatabase file and exporting each of the layers into it and renaming them with new names. To create a geodatabase, in the catalog pane right click folder and click new file geodatabase. Remove the old layers from the map while keeping the new ones. Now symbolization of the data should be carried out to give it a better look/appearance.


Step Three: Labelling

This step is very crucial in map making as it gives maps better looks. First and foremost, turning on of the labelling should be done for the suitable layers.To turn on labels, choose a feature layer in the content pane. On the feature layer click labelling tab. In the layer group click on label. Secondly, create a different label class for every style of text.Thirdly, keep playing with the labelling properties until they meet your desired appearance. Lastly, convert the labels to annotation and ensure your taste is met through editing.


Step Four: Making a layout

This step involves making a map that will be used as a key. To create a new map, move the cursor to insert icon on the window ribbon and click new map. Firstly, insert a new map and choose a suitable coordinate system. To choose a suitable coordinate system, move the cursor to the map properties, click coordinate tab, click Ok to set the coordinate system. Secondly, add the key map you have created to the layout. Thirdly, create a new layout guided by the chosen dimensions hence printing won’t be problematic. The empty map should be added to the layout and setting its position and size. The next step involves activation, panning and zooming of the map to desired extent and scale. In addition, open the map properties and apply the set scale as a reference scale, insert a layer template, save the edits and close the map activation. Add some more data that can explain to the target audience/reader where in the universe they are looking at. Make appropriate symbols and label for the map.


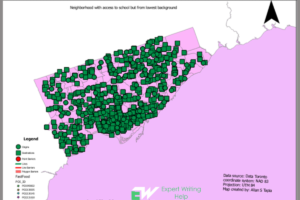
The next move involves inserting cartographic items. To do this, click insert icon and use cursor to move over and clicking on items that you like to insert to your map. Some of these cartographic items that need to be inserted may include: Title of the map, legend, scale bar, north arrow, graticule or grid, source credits, descriptive text, graphs, charts and pictures.
how to create map layout using ArcGIS Pro
Image 4: Showing a final map with legend, scale bar, title and north arrow.


Step Five: Proof reading

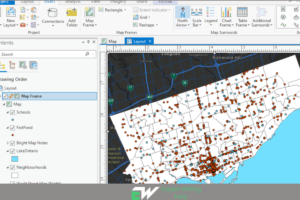
This is also very important stage of mapping that should not be skipped at any cost. This stage allows the cartographer to correct some mistakes they may have made during map making. To do this, ensure all the layers necessary are turned on. First the layout must be exported in pdf format for the errors to be seen and corrected on the map. The process has to be repeated for several time to ensure that all errors are fixed.
how to create arcgis pro
Image 5: Showing the prof reading process to ensure there are minimum to no errors in the final output.

Maps can also be created from carrying some spatial analysis. Some the basic of the common analysis may include: Buffering, calculating density by container, carrying out analysis using symbology to classify the data into desired percentages, performing some network analysis such as origin destination cost matrix to determine number of facilities that can be accessed from a chosen point.

To create a map that shows some facilities that can be accessed from a specific point, origin destination cost matrix can be performed. Move the cursor to the analysis tool > move to network analysis tool and click it > import the datasets in the destination, origin and set the desired parameters > click run to execute the analysis. The output will display some destinations and origin points as shown in a final map in image 5 below.
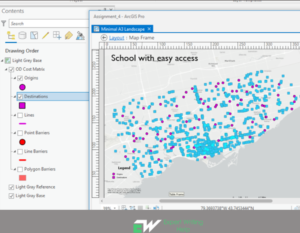
how to create destination map in arcgis
Image 6: Showing Origin destination map (school with easy access)


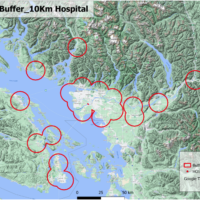
This tool is useful in creating new features around other features. To buffer a feature, click the edit > click modify features. In the modify features expand construct > navigate to buffer and click it. Click the template arrow > choose a template feature > in the buffer box type your desired distance to buffer > in the rings enter the number of multiple buffers > check preview and dissolve as well, also specify the shape of the buffer product > in the pane, click buffer.
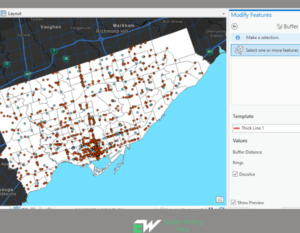
buffering geoprocessing tool in arcgis
Image 7: Showing buffering geoprocessing in ArcGIS Pro.


Symbology analysis can also be used to create specific map that classify the data into a specific class. For instance, population data can be classified into upper and lower quartile to create a specific map like the one shown below.
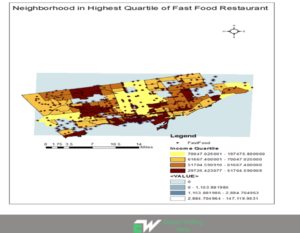
arcgis pro map assignment
Image 8: Showing the highest quartile of population neighborhood in terms of fast food restaurants


Higher and lower density areas in a dataset can easily be identified through creating an area density map. For instance, in the map below, the density of fast food restaurants in Toronto is calculated using container approach. The output is as shown in image 9 below.
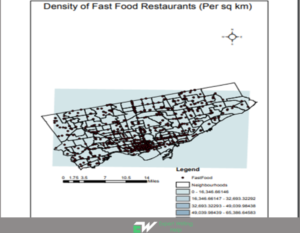
Image 9: Showing density of fast food restaurant in Toronto(per sq km).

Get Assistance with Creating Map in ArcGIS Pro from Expert ArcGIS Pro Tutors

Are you stuck with gis lab reports that require you to create maps using ArcGIS Pro? then worry no more. Our ArcGIS Pro assignment help will take you through step by step approach to creating well layout maps. Our expert GIS tutors are conversant with exporting maps, creating map layouts and map frames using ArcGIS Pro. You will also get to learn how to create map in ArcGIS Pro from finest analysts and cartographers online
16 Geoprocessing Tools Every GIS Analyst Should Know

16 Geoprocessing Tools To Use In GIS Homework Like GIS Pro

GIS involves utilization of tools in the GIS software to manage and analyze geographic(spatial) data. It mostly involves collection of data, processing and interpretation with an aim of creating maps. Other than possessing problem solving, team work, excellent communication and strong analytical skills; GIS Analysts must have knowledge of some basic geoprocessing tools.

Are you a student or newbie in using GIS software and would like learn to geoprocess like an expert GIS analyst? Well, you are at the right place. In this post, we have compiled an ultimate list of top 16 geoprocessing tools that GIS analysts at our GIS homework help service do use most.

You will learn basics as well as most common ways of processing GIS data that include clipping, buffering, merging, intersecting among others. Our comprehensive list of geoprocessing tools include tools that can be used in ArcGIS and QGIS softwares.

Geoprocessing tools are very essential when one wants to execute a certain analysis using the GIS software such ArcGIS or Qgis. Some of the most common geoprocessing tools that every GIS Analyst should know:

  1. Buffer tool
  2. Clip tool
  3. Merge Tool
  4. Dissolve tool
  5. Intersect Tool
  6. Union Tool
  7. The erase (Different) tool
  8. Spatial join tool
  9. Extract by Mask Tool
  10. Clip Raster Tool
  11. Extract by attributes tool
  12. Reclassify
  13. Project tool
  14. Near
  15. Calculate by Geometry
  16. Near

Buffer geoprocessing tool

This is a reclassification process based on distance inside or without a certain closeness. The output are normally polygons around input features at a given distance. Buffer geoprocessing process works in two ways: Euclidean and Geodesic.

Euclidean measures distances in 2D (Two-Dimensional) cartesian plane whereby the distances are calculated between two destinations on a cartesian plane (flat surface). It is ideal in analyzing distances around polygons that are focused in quite a small area.
Geodesic buffering calculates distances between two location or points on a geoid surface. The methods applied determine the kind of buffers created.

In ArcMap buffering can be performed through the following procedure: Click edit tool followed by clicking the feature where buffering is to be created around> click editor menu and then buffer> type the desired distance in map scale units> Select the target in which the new feature will be created> click ok.

geoprocessing tool
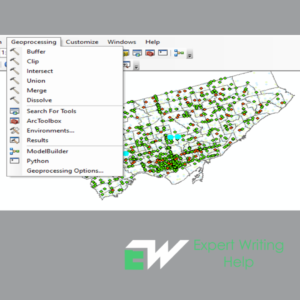
Figure 1: Showing Geoprocessing Buffer Tool


buffering process
Figure 2 Showing buffering process

Clipping geoprocessing in ArcGIS

This is creating a subset dataset from a larger dataset through cutting out a section of a certain dataset using a section or multiple of the features in another dataset. The clipping process is useful in choosing an area of interest or study area during spatial analysis. The clipping layer is always a polygon whereas the input layer can either be a polyline, points or polygons. Clipping can be performed both on vector and raster datasets. For Raster dataset, clipping is done using either graphics, data frame or polygons.

Clipping geoprocessing is as follows:

The first step involves clicking the edit tool on the editor tool bar

Clipping geoprocessing Tool
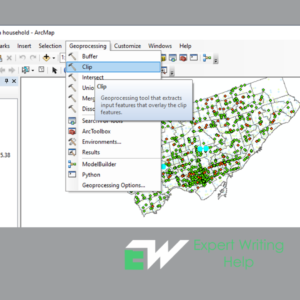
Figure 3: Showing Clipping geoprocessing Toll


Step two involves selecting the features to be clipped

clipping - geoprocessing tool
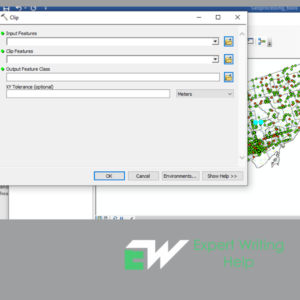
Figure 4: Showing the second step in clipping


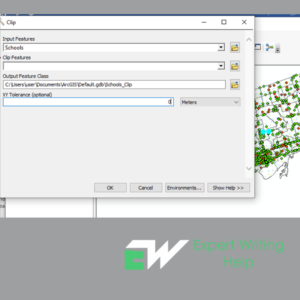
Step 3 involves typing the input features, output features and the tolerance value. Click the type of clipping operation whether to maintain or discard, then Ok.

3rd step in Clipping geoprocessing
Figure 5: Showing the 3rd step in Clipping geoprocessing

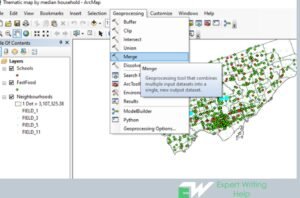
Merge Geoprocessing Tool

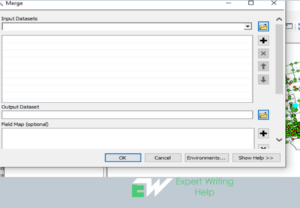
Merging in ArcGIS involves combing chosen features of the same layer or multiple layers into a new single feature. The feature must be either from a polygon or a line layer. In addition, also data sets must be from the same data type. The selected feature can either be modified or preserved.

Merging process in ArcMap involves the following process: Clicking the edit tool bar followed by clicking the features you would like to merge. Click the merge tool then click the feature the features will be merged into and finally click Ok to execute the process.

merging tool
Figure 6: Showing merging tool


showing merging geoprocessing
Figure 7: Showing merging geoprocessing.

Dissolve Geoprocessing tool

Dissolving tool generalizes and simplifies boundaries from a more complex to a simple. In most cases this tool adjacent edges on a common attribute values basis. The edges(boundaries) will melts into one only if the neighboring polygons share the similar dissolving attribute.

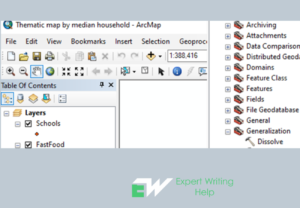
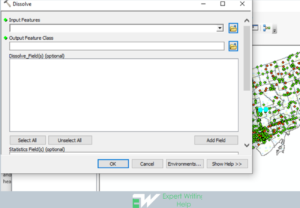
In ArcMap, dissolving tool can be accessed in the data management tool in the generalization toolset. It involves setting the fields that you would like to dissolve. To perform the dissolving geoprocessing: Click Arctoolbox> data management tool > Generalization > Dissolve > double click it. In the new window pane that appears > input files > output files will be selected automatically > Dissolve > Ok.

location dissolve tool in the Arctoolbox
Figure 8: Showing the location of Dissolve tool in the Arctoolbox


dissolving geoprocessing
Figure 9: Showing Dissolving geoprocessing.


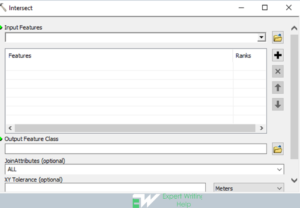
Intersect Tool

This tool calculates a geometric connection of the input features. In most cases, percentages or features of the feature that overlay in all layers or feature classes will be inscribed to the output(product) feature class. While performing this analysis it is advisable that the input features simple one like point, polygon or polyline.

To perform this analysis in ArcMap, go the toolbar > geoprocessing > intersect > enter the input feature, out put feature class, join attributes, tolerance attribute, output type > click Ok.

intersect geoprocessing tool
Figure 10: Showing intersect geoprocessing


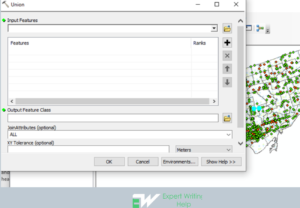
Union Geoprocessing Tool

The Union geoprocessing performs calculation of geometric union of whatever number of feature layers and classes. All input feature layers or classes must polygons in order for the output feature class to comprise polygons representative of geometric union of all involvements as well as the all the fields from all the input feature classes. Furthermore, union tool controls the spatial reference, clusters and cracks the features, determines geometric relationsamongst features from all feature classes and inscribes new features to the output.

To perform Union geoprocessing in ArcMap: Go to geoprocessing > navigate to union > click union > input the features > click Ok to execute the analysis.

union geoprocessing
Figure 11: Showing union geoprocessing.


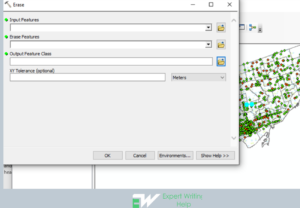
Erase Geoprocessing Tool

Erase tool generates a product feature class by overlapping the input features with the erase features. Only those percentages of the input features falling exterior of the erase features are copied to the product feature class.

To carry out erasing geoprocessing in ArcMap: Go to geoprocessing> navigate to search > type and search erase geoprocessing tool > Enter input features > enter erase features > enter output feature class > enter tolerance > click Ok to execute the analysis.

Erase geoprocessing tool
Figure 12: Showing erase geoprocessing.


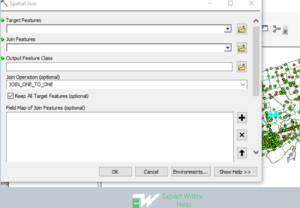
Spatial Join Geoprocessing Tool

This tool joins attributes from one feature to another grounded on the spatial connection. The target features and the merged attributes from the combined features are inscribed in the product feature class. All attributes of the merge features are added to attributes of the target features and cliched over to the output feature class. In the process attributes to be written to the output can be defined.

Spatial join analysis can be carried out in ArcMap as follows: Click on the geoprocessing> navigate to search > type spatial join tool > click the tool > enter the target feature, join features, click Ok to execute the analysis.

spatial join geoprocessing tool
Figure 13: Showing spatial join geoprocessing.


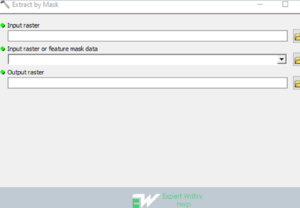
Extract by Mask

This is a spatial analysis function that extracts the cells of a raster that correspond to the areas defined by a mask. Attributes from the input raster will be carried over to the output raster attribute table.

To perform extract by mask analysis in ArcMap, the following steps are followed: Click the geoprocessing and navigate to the search > type extract by mask > click the tool> input the Raster data, input the feature mask data, enter the output raster > Click Ok to execute the function.

Showing Extract by Mask Analysis
Figure 14 Showing Extract by Mask Analysis


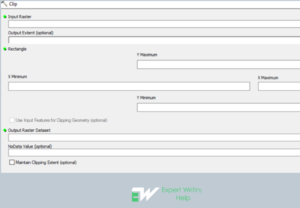
Clip Raster Geoprocessing

The Clip Raster tool permits the extraction of a percentage of a raster dataset on the basis of a template extent. The clip product comprises of any pixels that interconnect the template extent.

Clip Raster geoprocessing is carried out in ArcMap as follows: Enable image analysis Toolbar > image analysis > select the Raster to clip > enter polygon boundary to clip to > Click clip icon > click save to export Raster.

Clip Raster geoprocessing tool
Figure 15: Showing Clip Raster geoprocessing


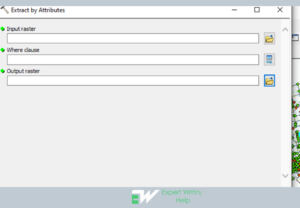
Extract by Attributes Geoprocessing

This function involves extraction of the cells of a raster on a logical query basis. Attributes from the input raster dataset are normally passed over to the product raster attribute table. Liable on the property presence documented, part of the attribute values may require to be recalculated.

In ArcMap, extract by attribute analysis can be performed as follows: Click on geoprocessing > Navigate to search and type “extract by attributes” > Navigate to the tool > enter input raster, enter the “where value cluster”, enter the output raster > click Ok to perform the analysis.

Showing the extract by attributes geoprocessing
Figure 16: Showing the extract by attributes geoprocessing.

Figure 15: Showing the extract by attributes geoprocessing.

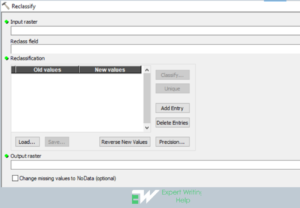
Reclassify geoprocessing tool

Reclassify tool deals with values in a raster. The tool reclassifies the values in a raster. It uses some parameters such as “classify or unique” generates map based on the values of the input raster dataset.
Reclassify geoprocessing can be performed as follows in the ArcMap: On the geoprocessing navigate to search > enter “reclassify” > click on the tool analysis > enter the input raster, enter the reclass field, enter reclassification (whether unique or classify), enter the output raster > click Ok to execute the function.

reclass geoprocessing tool
Figure 17: Showing reclass geoprocessing

Project Geoprocessing Tool

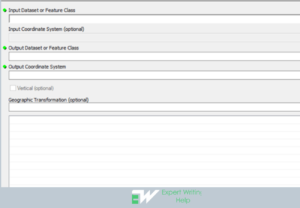
Project geoprocessing tool is useful in projecting spatial data from one coordinate system to another. To perform this in the ArcMap, the following steps are followed: Go to Arctoolbox > Data management > projection and transformation > project > enter the input dataset or feature class, output dataset or feature class, output coordinate system > Click Ok to execute the function.

showing project geoprocessing tool
Figure 18: Showing project geoprocessing tool.

Near geoprocessing Tool

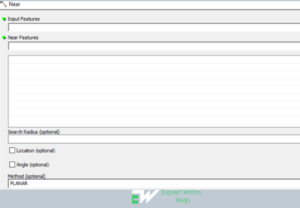
Near(analysis) tool helps the GIS Analyst to compute distance and extra nearness info between the input features and the nearby feature in another layer or feature class. To perform “near analysis” in ArcMap, the following steps are useful: On the geoprocessing navigate to the search > type “near analysis” > On the appeared tab enter the: Input features, near feature, enter the method and click Ok to execute the function.

Showing near(analysis) geoprocessing
Figure 19 Showing near(analysis) geoprocessing

Calculate by geometry geoprocessing tool

Calculate by geometry can be utilized by any GIS analyst when they want to add info to a feature’s attribute fields in place of geometric features and location of each feature like area or length, elevation and x-y coordinates.

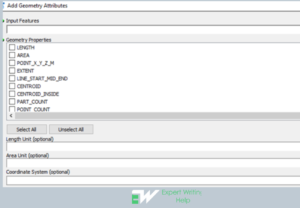
To carry out “calculate by geometry” in ArcMap, the following steps can be followed: go to the geoprocessing and navigate to search > click and type “calculate by geometry” > click in the “add geometry attributes”> enter input features, geometry properties, length unit, area unit > click Ok to execute the function.

Showing calculate by geometry geoprocessing
Figure 20 Showing calculate by geometry geoprocessing


References
Introduction to arcgis pro (no date) Introduction to ArcGIS Pro-ArcGIS Pro | Documentation. Available at: https://pro.arcgis.com/en/pro-app/latest/get-started/get-started.htm (Accessed: April 3, 2023).

Guide To Writing Scientific Lab Report

Guide To Writing Scientific Lab Report

guide to writing scientific lab reports
An experiment being carried out in a lab

The scientific world is one that is rich in information and even richer in technology. For the longest time now, man has strived to understand all that is around him and find out more about nature through experimentation either for recreation, learning, or when his survival entirely depends on it. In the modern-day and age, things have really changed and the strides that have been made are quite huge and this means that things are also done differently. Lab analysis and experiments especially in the academic field are always followed by a lab report. This is of course in preparation for the career world as this is embedded into each and every one. So, as you begin writing scientific lab report, what do you really have to have in mind and what exactly are you expected to articulate for maximum effectiveness.

After sourcing from the best sources on a worldwide scale on what it takes to write the best scientific lab report, I have made a compilation of everything that you need to know so as to be at the top of your game. So, without further ado let’s dive right into it.

Title

The title is a very essential part of your lab reports as it gives it the identity and it gives the reader a clear line of where you are heading. The title should be brief and precise. It should only include the very essentials of the report and should tell the reader what you will be writing about. Remember that you should position your title in liaison with your hypothesis as this kind of flow will synchronize your whole paper. Always make the title descriptive, informative, and direct.

The first page of your lab report should be dedicated to the title, which is why it is called the ‘title page’. On top of the actual title of your paper, you should also include the name of the author(s) and the date it was published.

Table of content

The table of content is basically a guide of what shall be included in the paper and it only highlights the subtitles in the paper and the number page. It makes work easier and organizes your paper in a professional manner. It also comes in handy when you need to reference or scheme for certain information. Having in mind that you have already conducted the whole experiment beforehand then this should be very easy as it is basically a review of what you did. According to research done late last year showed that you should always start off by filling the table of content, it gives you the format that you will use in your paper. The reason behind this is because it follows the APA format of writing that is globally recommended and accepted for these kinds of papers. The APA format of writing encompasses a variety of details among which are font used, the procedure to be followed, and most importantly the dos and don’ts.

When following this style of writing you can be sure not to miss any detail as it is basically similar to implementing an already established system. If you are familiar with the APA format of writing you will realize that it is well articulated in the following steps.

Abstract

The abstract of your paper is supposed to give the general feeling of your paper and give a pre-summary of what you will covering. Of course, you cannot go into details as that will be well handled in the conclusion. This helps set up the rhythm of the paper. Ensure that you give the main ideas in the paper but do not pick-up phrases from the article unless it is a direct quotation.

Introduction

Everyone knows that in everything that you do, there must be an introduction, may it be a meeting, interview, or even formal documents this is no different here. You have to start it off with a strong introduction. This creates a firm basis for your lab report. In this section, you can state the hypothesis. The hypothesis is the guiding statement that tells what experiment you shall be tackling and on top of that the expected results at the end of the experiment. This should be in liaison with the title.

When creating your introduction, you can also review an existing theory of the research that you will be undertaking. Mostly the experiments that you will be conducting will not be a new thing in the field and there might be a paper done on the same and it is vital that you compare your results for the purpose of accuracy. However, depending on a couple of variables such as your sample and other surrounding factors, it is possible to get different results. This does not mean that you are wrong. Select the most suitable theory that fits your circumstances and that is most likely to give similar results to yours.

Next, you need to give basic information on the theory and how it is related to what you will be handling. This elevates your reader’s position and eliminates any dangling questions.

Lab safety and precautions

The word experiment according to the English dictionary means ‘perform a scientific procedure, especially in a laboratory, to determine something.’ This means that the reaction is still unknown until the experiment is done. A simple wrong miscalculation and wrong mixing of solutions could lead to an unprecedented reaction that could be catastrophic. Hereby, you are urged to get through all lab safety and precautions depending on the kind of experiment you will be conducting. Ensure that everything is clearly labeled and that safety measures are in place.

Your scientific lab report could potentially be used in the future by another scholar as a point of review and this could have an immense impact. It is the small things such as these that matter.

The experimental procedure, types of equipment, methods, and collection

Now going a notch deeper into this, you now define your experiment. What do I mean by defining your experiment?

Identify your equipment

Different experiments require different types of equipment and components to test different reactions. You need to first identify all your equipment and solutions and samples as well that you will be engaging. The more details that you offer here, the better. You should describe everything in all its aspects possible, by color, texture, shape, form, smell, and all other characteristics. This will give a clear picture of what you are working with.

State your experimental procedures

Experimental procedures are an accurate representation of how you conduct your experiment to achieve certain results. They include definite facts and should be followed to the letter. Depending on the type of method you have chosen then it has its own procedure and if it is messed up could render the whole project void. This is because a change in procedure leads to different results and using the wrong measure of solutions makes the project ineffective.

Data collection

write my lab report
Data collection in a lab

As a scientist, the very heart of your work is in keeping records. Records are basically a written representation of your findings from your experiment as a result of the seen reactions. Data collection is mostly done in a tabular form and maybe a combination of statements and figures. This representation of data is essential in data analysis and making conclusions.

While collecting data you can do it in a guided manner, or in an unguided manner. Some procedures also define how data should be collected while others leave it up to the researcher depending on what they are looking for. In every stage, make sure to note even the slightest change. Remember that a state of no reaction is still a result that should be considered and documented. However, you should already have in mind what you were expecting to find. This basis is already created from the data you had collected from previous similar experiments done. It can also be guided by your hypothesis.

Calculations

Raw data is not useful to anyone other than the researcher, and this is only to a certain degree. This means that you have to synthesize the data into more meaningful information by doing the necessary calculation on your data depending on the results that you got and also depending on what you want to prove. These calculations should be inclined towards proving your hypothesis and MUST be shown.

The main reason for showing your calculations is to remove any doubts from your evaluator or reader’s mind on the clarity of your results. It could also save you the hustle of having to retrace where you might have messed step. It works as a win-win for everyone.

Results

Now that you already have the calculations in check it time to make meaning from all that you have done. First things first, Are the results found the same as what you expected? If so what does it mean for your paper? If not, where did you go wrong/ was it on your hypothesis? experiment? your data collection or in your analysis? If you are able to answer all these questions then you are set up for a good finish.

Conclusion and summary

A strong conclusion is ideal for these sorts of papers. They give you an open ground to basically review your paper and experiment process as well. You are allowed to give an acute but brief overview of your experiment, data collection, and analysis. You can state the challenges you might have faced and also give recommendations. A well-placed conclusion will often take your paper from a 7 to a 10.

While writing the summary it is vital that you give credit where it is due and acknowledge the sources from which you base your work on so as not to be flagged for plagiarism. On top of giving the collaboration of your hypothesis, (thesis, if available) and your results you can also state your references as well. Credibility is key.

The whole representation of the lab report should be in a formal tone, in the past tense as it is assumed that you only compile this paper after you have conducted the experiment and you use the third person reference.

If this all seems complex for you, you can always pay someone to write my lab report and compile it for you and you can be sure to get the best quality there is. The simple reason is that an expert lab report writer has handled a lot of such projects and are up to date with the different writing style as recommended. They also know when and how to include the presented information. Lab report writing have never gotten this easier.

With all the above information you can be sure that you are set up for the perfect lab report.

Get lab report help online