40 Community Health Nursing Research Topics

40 Community Health Nursing Research Topics

best Community Health Nursing Research TopicsCommunity health nursing is one of the most picked nursing specialties mainly for its wide-ranging job opportunities in a variety of healthcare or community settings. A community health nurse can be employed to work in hospitals, nursing homes, clinics, correctional facilities, public health departments, county and state departments of health, schools, or occupational health programs among other facilities in the community. Community health nurses may also travel to serve communities in remote locations solo or as part of a multidisciplinary team.

Generally, community health nurses work toward providing successful outcomes for critical circumstances. In providing their duties, community health nurses serve as agents of healthful changes in different communities. This is because of their interaction with underserved communities, these nurses can advocate for better services as well as inform policymakers on the needed reforms in healthcare.


If you are pursuing to become a community health nurse, you must already know how hectic the program is, especially when it comes to completing assignments. Finding a nursing research topic idea is one of the assignments that give community health nursing students sleepless nights. This is because, with the right community health nursing research topic idea, writing the research paper becomes seamless.expert writing help

What is a Community Health Nursing Research?

A community health nursing research focuses on a community health nursing-relevant topic instead of a general nursing-relevant research topic. As such, this nursing research paper tackles the topic from a community health nursing standpoint.

Additionally, researchers undertake nursing research to produce new knowledge in community nursing or confirm existing knowledge based on community nursing theory by testing hypothesis or answering research questions, which is major distinction with EBP and quality improvement projects.

When writing a community health nursing research paper, you must adhere to the laid nursing research paper writing standards. This means that your community health nursing research paper contains all the vital components, it is appropriately formatted and structured and the citations are formatted according to APA style commonly used in nursing papers.

Types of Community Health Nursing Research

There are two types of community health nursing research: qualitative and quantitative research. The difference between these two types of nursing research arises from the research design one intends to use.

Quantitative research in community health nursing

Quantitative research in community health nursing aims at gaining empirical evidence through deduction and generalization. In this case, you will gather evidence to either support or refute a certain theory and decide to what extent the outcome can be generalized to a larger population. Quantitative research can either be experimental or non-experimental in design.

Experimental designs imply the research exercise (experiments) requires strict control from the researcher. This design can be used to establish cause-and-effect relations or predictions. However, the experiments done are often blind to help avoid bias. Experimental designs are categorized as:

  • True-experimental designs: In these designs, cause-and-effect relationships are examined in a controlled setting. These designs entail studying two groups of the population who got different treatments that we assigned randomly.
  • Quasi-experimental designs: These designs differ from true experimental designs in that they lack random assignment.

Non-experimental designs focus on describing what happens naturally. These designs are used to detect causes and effects but are not effective for making predictions. Non-experimental designs are categorized as:

  • Descriptive: Descriptive non-experimental designs are focused on under-researched topics, subjects, or phenomena. In this case, you describe it, examine how often it occurs, and classify the information you have acquired.
  • Correlational: Correlational research focuses on the examination of relationships between variables. Therefore, you ought to measure the variables, analyze the outcomes, and present statistics.

Qualitative research in community health nursing

Qualitative research in community health nursing focuses on individual experiences and is done through observation and interaction with patients through interviews, diaries, and notes. An induction method is usually used to allow you to acquire evidence to support a theory without generalizing the outcomes. qualitative research design is classified into four types:

  • Grounded Theory: Grounded theory research entails the influence of social processes on individuals. As such, you will need to interview the individuals themselves, their relatives, spouses, etc. before synthesizing the data into one theory.
  • Phenomenology: This is a research design that focuses on describing the phenomena as they are experienced by a subject. In this research, you are required to select people who are familiar with the particular health issue. You will then gain information from each individual the make an informed conclusion.
  • Narrative Inquiry: This is a research study design that is grounded in the interpretation of the personal accounts of the participants. As such, you will ask your subjects to talk about their health experiences and then analyze their narratives. Be sure to take into account the contents and structure of their narratives.
  • Ethnography: This research design is connected to the influence of a specific health culture on individuals. Therefore, it involves describing the unique attributes of the health culture from an insider’s viewpoint.

With these types of community health nursing research in mind, you can confidently choose your nursing research topic without a hassle. Now, let’s look at how to choose a good community health nursing research topic.

How to Choose a Suitable Topic for Community Health Nursing Research?

To craft w well-articulated and relevant community health nursing research paper, you need to first choose a suitable topic. So, how do you choose the right research topic? Well, here are the steps to choosing the most appropriate research topic for your community health nursing research paper.

  • Firstly, identify an ideal community health nursing research area you are passionate about
  • Secondly, from your preferred community health nursing research area, collect enough research ideas
  • Brainstorm all the gathered research topic ideas and eliminate the topics with less or no research scope
  • From the research ideas you have shortlisted, pick one community health nursing research topic that you feel comfortable exploring and writing about.
  • The community health nursing research topic you settle on should satisfy the research paper writing guidelines shared by your lecturer or college.

Alternatively,

you can inquire from our DNP writing service for free assistance on developing emerging and innovating research topic.

40 Community Health Nursing Research Topics

  1. Frailty as a deciding factor for nursing home placement-review of literature
  2. The role of nursing in educating women about Intimate Partner Violence and recourse choices in the US
  3. The critical role of nurses in raising awareness and educating patients in a multicultural environment-literature review
  4. Serving in underserved communities-role definitions of community health nurses in the US
  5. Double demanding patients in community health services-nursing perspective
  6. The role and scope of nurses in community health care in the US
  7. A review of the education practices in community health and implications for practicing nurses in the US
  8. Simulation as an interactive tool in community health nursing to improve societal health outcomes – a review
  9. Health and lifestyle advice – a look at nurse scope of responsibility in community health to promote well being
  10. Mental health nursing in the US – an investigation of the personal challenges in pursuing the profession and how these are managed
  11. Psychiatric care by nursing professionals within community settings – review of literature
  12. How are nurses trained to deal with depression in inpatient settings in the US? An investigation
  13. The mental health nurse – scope of responsibilities and challenges faced in outpatient settings
  14. A review of nursing practices and challenges encountered in adolescent and women’s prisons in the US
  15. The position of the family in community health service provision – an exploratory investigation
  16. Reporting and disclosure policies in community health nursing – a literature reviews
  17. Ethics in community health nursing – a review
  18. An assessment of social outcomes based on community health nursing care—how valid are the measurements?
  19. Communication and community health service and care provision – establishing the link and its outcomes
  20. Evidence-based community health nursing-literature review on deviations and complements of the regulatory frameworks and guidelines
  21. Best practice standards in community health care in the US– Review of literature
  22. An investigative perspective on the historical evolution of community-based health care and nursing provision in the US
  23. An investigation of the global progress in standards of community health nursing
  24. Community health nursing – going through the motions or provisions of care and empathy?
  25. An investigation into the outcomes of the use of assessment and education tools by community health nurses in the US
  26. An investigation of the global progress in standards of community health nursing
  27. The role of community support in maintaining emotional health during pregnancy
  28. An analysis of HIV risk practices amongst women of childbearing age
  29. Knowledge and attitude of black pregnant women towards antenatal exercise: A cross-sectional survey
  30. The effects of dietary counseling on gestational weight gain and glucose metabolism in obese pregnant women
  31. The role of school-based interventions in preventing childhood mental health problems
  32. Occupational preferences, cognitive and affective factors in female students in the US: A comparative study
  33. Patient perception and satisfaction with healthcare professionals at primary care facilities
  34. Maternal comprehension of home-based growth charts and its effect on growth
  35. The assessment of the nutritional status of the community; Case study
  36. Socioeconomic differentials in child nutrition and morbidity in remote areas of the US
  37. The predictors of pregnancy-associated change in physical activity in a rural white population
  38. Pre-pregnancy weight and the risk of adverse pregnancy outcome
  39. A randomized controlled trial to prevent excessive weight gain in pregnant women
  40. Retention of pregnancy-related weight in the early postpartum period: Implications for women’s health services

How to Write a Winning Community Health Nursing Research Paper?

If you are unsure of how to write a brilliant community health nursing research paper, then this section is a must-read. We have outlined basic steps to help you write a top-grade community health nursing research paper without a hassle.

  • Now that you have your ideal community health nursing research topic, perform an in-depth analysis of your topic to derive a powerful thesis statement for your research paper.
  • Secondly, using appropriate nursing research methods, do in-depth research on your chosen topic and collect the most relevant and valuable points, sources, and materials in support of your thesis statement.
  • With the gathered ideas, sources, and materials, craft a well-structured essay outline including the introduction, body, and conclusion.
  • With the draft, write a comprehensive community health nursing research paper with adherence to the outline. Be sure to exhaustively explain all the main points relevant to the thesis statement while supporting it with reliable evidence and references.
  • Once you finish writing your research paper, edit and proofread it. Make sure your nursing research paper is flawless and plagiarism free before submission.

Final Thought

When choosing a community health nursing research topic, you can feel like you have nowhere to start from or even under a lot of pressure. Without a doubt, choosing a community health nursing research topic can prove difficult. However, with good guidance, you can settle on your most interesting and researchable topic.

Hopefully, you will find our list of 40 best community health nursing research topics inspirational and worthy of your consideration when writing your nursing research topic. Besides, if you don’t have the time to research ad write your winning community health nursing research paper by yourself, you can ask us to help with writing nursing paper for you. Our nurse writers are dependable and provide high-quality research paper writing services.

expert writing help


Sampling Theory in Nursing Research

Common Sampling Theory in Nursing Research

Sampling Theory in Nursing ResearchSampling theory in nursing research refers to the principles and approaches used to choose a representative sample of participants from a larger population for a research study. The sampling theory is essential in nursing research since it enables researchers to draw conclusions about a population based on the data collected from a smaller group of people.

Similarly, sampling theory is used in nursing capstones to draw representative samples in a population. In this article, we look at some of the key concepts as well as considerations associated with sampling theory in nursing research and when to use this theory. So, without much ado, let us look at the key concepts for sampling theory in nursing research;

What are the Key Concepts of Sampling Theory in Nursing Research?

Population

In sampling theory or any research done, population refers to the entire group of individuals that the researcher wants to research. For instance, if you intend to focus your study on elderly patients with diabetes, then the population would be all elderly patients with diabetes.

Sample

In nursing research, a sample refers to the subset of the population that is selected for the research. Since it is not feasible or practical to research the entire population, researchers often select a representative sample for purposes of gathering data. The sample should possess similar characteristics to the entire population. A representative sample ensures that the research is free from bias and external validity shortcomings.

Sampling Methods

Sampling methods refer to the various methods used to sample data used in nursing research, and they include probability and non-probability sampling.

Probability Sampling: Probability sampling is a sampling method that involves the random selection of participants from a population while ensuring every individual has the same chance of being included in the sample. Some of the common probability sampling methods include stratified random sampling, simple random sampling, and cluster sampling.

Non-Probability Sampling: The non-probability sampling method does not involve random selection of the sample, which may introduce bias into the sampling. Some of the commonly known non-probability sampling include; convenience sampling – selecting participants based on availability, purposive sampling – selecting participants with specific characteristics), and snowball sampling –  selecting participants through referrals.

Sample size

It is crucial to determine the appropriate sample size to ensure that the research findings are statistically significant and generalizable to the population. For sample size calculations, you should consider factors such as expected effect size, desired level of precision, and statistical power.

Representativeness

The sample should be representative of the population to ensure that the findings can be generalized. Researchers need to carefully consider the characteristics and demographics of the population when selecting participants to create a sample that precisely reflects the large population.

Sampling bias

Sampling bias refers to when the sample is not representative of the larger population, thus leading to distortion or an inaccurate representation of the study findings. Therefore, researchers should be conscious of potential sources of bias and take steps to minimize or account for them.

In a nutshell, sampling theory in nursing research is important since it ensures the research findings are valid, reliable, and applicable to the target population. By using suitable sampling methods, nursing researchers can enhance the quality and generalization of their study findings, thus contributing to evidence-based nursing practice.

When to Use Sampling Theory in Nursing Research

In nursing research, sampling theory is used by researchers whenever they want to draw conclusions about larger populations based on data gathered from a smaller sample. Well, what are some of the situations when sampling theory is used in nursing research:

Generalizability

Often, nursing researchers aim to generalize their findings to a larger population. So, by selecting a representative sample as per suitable sampling methods, researchers can make inferences about the entire population. For instance, if research aims to investigate the effectiveness of a nursing intervention for a specific condition, the outcome can be generalized to the broader population of patients with that condition.

Limited resources

Essentially, researching an entire population may be impractical or unfeasible due to limitations like time, cost, or logistics. However, sampling theory allows researchers to choose a smaller, manageable sample that still offers meaningful insights into the research question. As such, researchers can make efficient use of accessible resources and conduct research within realistic constraints.

Ethical considerations

In some situations, it may not be ethically appropriate or feasible to include the entire population in a research study. For instance, research involving vulnerable populations or invasive procedures may require researchers to select a smaller sample to minimize risks and ensure participant safety. Moreover, the sampling theory helps researchers to choose an appropriate sample size and sampling method that balances scientific rigor with ethical considerations.

Statistical analysis

Sampling theory is closely linked to statistical analysis. With the use of suitable sampling methods, researchers can apply statistical tests, and inferential statistics, and calculate confidence intervals to draw valid conclusions for the sample data. Therefore, researchers can quantify the level of confidence in their findings and make statistical inferences about the population parameters.

Research design

Sampling theory is an essential part of research design. Researchers need to consider the target population, research objectives, available resources, and practical constraints when determining the sampling strategy. As such, the choice of sampling method and sample size directly influences the study’s validity, reliability, and generalization.

In a nutshell, sampling theory is used in nursing research, especially when researchers want to select a representative sample from a large population to draw valid conclusions and make generalizations. The sampling theory is useful, especially when research resources are limited, ethical concerns come into play, or statistical analysis and research design need a smaller sample for practical reasons.

In case you face any difficulty applying sampling theory in nursing research you can seek help from our DNP capstone project writers for assistance any time of the day.

Methods of Sampling in Sampling Theory in Nursing Research

Sampling is a crucial aspect of nursing research that enables researchers to gather representative data from a larger population. By picking a subset of individuals or units from a target population, researchers can draw inferences and make generalizations about the large group.

Understanding the different methods of sampling is essential for ensuring the reliability and validity of research findings in nursing. So, what are some of the different sampling methods commonly used in nursing research, their advantages and limitations?

Probability sampling methods

Probability sampling methods are based on the principles of random selection, ensuring that every member of the target population has an equal chance of being included in the sample. The probability sampling methods provide a solid foundation for generalizing research findings. These methods include:

  • Simple random sampling

In simple random sampling, each member of the population is assigned a unique number, and a random selection process is utilized in choosing the participants. The simple random sampling method is direct but may be challenging to implement in larger populations.

  • Stratified random sampling

Stratified random sampling involves the division of populations into sub-groups or strata based on specific characteristics like gender or age. Participants are randomly chosen from each stratum, thus ensuring representation from each group. Stratified random sampling allows for more accurate comparisons between groups. However, it requires prior knowledge of the population’s characteristics.

  • Cluster sampling

Cluster sampling entails dividing the population into clusters or groups such as hospitals or nursing units. Researchers randomly select a few clusters and include all individuals within those clusters in the sample. Cluster sampling is useful when the population is geographically dispersed or difficult to access individually.

Non-Probability sampling methods

Non-probability sampling methods do not rely on random selection thus making it difficult to generalize the findings to the entire population. Regardless, these methods are often more practical and cost-effective in nursing research. The following are some of the non-probability sampling methods:

  • Convenience sampling

Convenience sampling entails selecting individuals who are readily available and accessible to the research. Although this method of sampling is convenient, it may introduce bias as it relies on the researcher’s judgment and accessibility.

  • Purposive sampling

Purposive sampling involves selecting participants who possess specific characteristics or experiences relevant to the research question. Researchers purposefully choose individuals who can provide rich and in-depth information. While this method allows for target data collection, it may limit generalizability.

  • Snowball sampling

Snowball sampling depends on participants referring to other potential participants who share similar characteristics or experiences. The snowball sampling method is useful when researching rare or hard-to-reach populations. Regardless, it may also introduce bias as participants may refer to individuals who share their perspectives.

Conclusion

Sampling theory in nursing research as it enables researchers to collect data that represents the larger population.  Understanding the various sampling methods, both probability and non-probability is vital for researchers to choose the most appropriate approach for their research.

Probability sampling methods such as simple random sampling, cluster sampling, and stratified random methods, offer a strong foundation for generalization. On the other hand, non-probability sampling methods, like convenience sampling, purposive sampling, and snowball sampling, provide practical alternatives when probability sampling is challenging or not feasible.

As such, researchers must carefully reflect the strengths and limitations of each sampling method, ensuring that their chosen method aligns with the research question, population characteristics, and available resources. By using suitable sampling methods, nursing researchers can enhance the validity and reliability of their findings, ultimately contributing to evidence-based nursing practice.

10 Steps to Writing a Winning MBA Project Proposal

10 Essential Steps to Writing Winning MBA Project Proposal

In business, ideas are prolific, but a well-crafted proposal to bring those ideas to life is pure gold.

This is especially true when it comes to your MBA journey, where your project proposal can be the key to unlocking opportunities and paving the way for academic success. The proposal is not merely a formality but a testament to the researcher’s ability to conduct significant research. It is a document that is often used to assess the feasibility of the project and the researcher’s preparedness to undertake the study.

How do you ensure your MBA project proposal stands out from the rest though? How do you craft a proposal that not only meets the academic standards but also captures the attention and interest of your audience?  This post will guide you through 10 essential steps to craft a winning MBA project proposal.

  1. From choosing the right topic,
  2. Conducting preliminary research,
  3. Defining the problem statement,
  4. Setting objectives,
  5. Developing the methodology,
  6. Creating a project timeline,
  7. Reviewing the literature,
  8. Outlining expected results
  9. Preparing the budget
  10. To proofreading and editing your proposal.

Why Do You Need an MBA Project Proposal?

how to write MBA project proposalOkay, let’s get real for a second; You might be sitting there, scratching your head, thinking, “Why do I even need to write an MBA project proposal though?” Well, let me break it down for you:
Imagine you’re about to embark on a road trip. You wouldn’t just jump in the car and start driving without a clue where you’re going, right? You’d have a map, or at least use the GPS on your phone.

That’s exactly what your MBA project proposal is – it’s your roadmap, your GPS. It’s what guides you from the starting point of your project all the way to the finish line. Something to keep in mind too is that your project proposal isn’t just for you. It’s also your chance to show everyone else what you’re made of.

It’ll help you show your professors and peers that you’ve got the knowledge and skills to tackle a big problem and come up with a solution. That said, let’s keep going. Next up, we’re going to take a deep dive into the 10 most essential steps to crafting an awesome project proposal.

Step 1: Choosing the Right Topic

We will start with – picking your topic. Now, you might be thinking, “I’ve got a tens MBA project topics ideas, how do I even choose just one?” Well, choosing the right topic for your MBA project proposal isn’t just about picking something that interests you (although that’s definitely important!).

It’s also about choosing a topic that’s relevant, impactful, and manageable. What do I mean by this?

  • Relevance. You want to choose a topic that’s relevant to your field of study and the current business landscape. Think about the big issues in your field right now.
  • Impact. The best MBA project proposals are those that have the potential to make a real impact. So, think about how your project could contribute to your field.
  • Manageability. It’s easy to get carried away with big ideas, but remember, your project needs to be something you can actually achieve.

Think about the resources you have available, the timeframe you’re working with, and the scope of your project. You want to choose a topic that’s ambitious, but also realistic.

Step 2: Conducting Preliminary Research

Okay you now have got the topic, it’s time to roll up your sleeves and get down to business. And by business, I mean research.

A solid MBA project proposal is built on a foundation of thorough, well-conducted research. It’s like the secret sauce that adds depth and credibility to your proposal. So, let’s talk about how to do it right.

  • First things first, you want to start with a broad overview of your topic. Look for general information that can help you understand the context and background of your topic.
  • Next, you want to start narrowing down your research. This is where you start looking at specific studies, reports, and papers related to your topic. You’re looking for data, facts, and insights that can support your project proposal. Use academic search engines like Google Scholar, your university database, and references from relevant articles to find existing research that helps answer your research question. You can also leverage other students’ dissertations related to your topic.
  • Finally, remember that research is a process. It takes time and patience. But trust me, it’s worth it. The more you know about your topic, the stronger your project proposal will be.

Step 3: Defining the Problem Statement

Your statement of the problem is like the heart of your project proposal. It’s the thing that gives your project purpose and direction.

It’s the question you’re trying to answer, the problem you’re trying to solve, the issue you’re trying to address. It’s the “why” behind your project.

So, how do you do it?

  • Start by clearly stating the problem. What is the issue you’ve identified in your research?
  • Next, explain why this problem matters. Why should people care about this issue?
  • Finally, describe what you don’t know yet – the gaps in knowledge that your project will fill.

Step 4: Setting the Objectives

These are the goals you’re aiming for. They’re the “what” of your project.

But here’s the catch – your objectives need to be SMART:

  • Specific: Specific means your objectives should be clear and precise. Instead of saying “I want to improve business strategies,” say “I want to develop a new marketing strategy to increase customer engagement by 20%.”
  • Measurable: Measurable means you should be able to track your progress. You need to know when you’ve achieved your objective, so make sure there’s a way to measure it.
  • Achievable:  Achievable, your objectives should be realistic. It’s great to aim high, but make sure your objectives are something you can actually accomplish.
  • Relevant: Relevant, be aligned with your problem statement and the overall goal of your project.
  • Time-bound:  Time-bound, have a deadline. When do you want to achieve your objectives? Set a timeline to keep yourself on track.

Step 5: Developing the Methodology

Think of your research methodology as your project’s blueprint. It’s the plan that outlines how you’re going to conduct your research and achieve your objectives. It’s the “how” of your project.

Your methodology should cover a few key areas.

  • First, you’ll want to outline your research design. Are you conducting a case study? A survey? An experiment? Describe the approach you’re taking and why it’s the best fit for your project.
  • Next, you’ll want to detail your data collection methods. Are you conducting interviews? Sending out questionnaires? Mining data from existing databases? Explain how you’ll gather the data you need for your project.
  • And finally, don’t forget to address any ethical considerations. If you’re dealing with human subjects, for example, you’ll need to explain how you’ll protect their privacy and obtain their consent.

Step 6: Creating a Project Timeline

Your timeline should outline the key stages of your project and set deadlines for each one. This includes everything from your initial research and data collection to your analysis, writing, and revisions.

But here’s something to note – your timeline needs to be realistic. It’s easy to underestimate how long tasks will take, so give yourself plenty of time for each stage. And don’t forget to factor in some buffer time for unexpected delays or challenges.

Step 7: Reviewing the Literature

Literature review isn’t just about finding relevant sources. It’s also about understanding the bigger picture.

How do you do it? Well,

  • Start by searching for sources that are relevant to your topic. Look for recent studies, influential theories, and key data.
  • Then, read these sources critically. What are their strengths and weaknesses? How do they relate to your project?

And remember, a good literature review isn’t just a summary of sources. It’s a critical analysis.

Step 8: Outlining the Expected Results

Outlining your expectations is about setting clear expectations and preparing for different outcomes.

Your expected results section is where you get to imagine what success looks like for your project.

Be aware that – research is unpredictable. Things don’t always go according to plan. So, it’s also important to think about potential challenges or obstacles you might face.

What will you do if your results don’t align with your expectations? How will you handle unexpected findings?

Outlining your expected results is a bit like drawing a map of the future. It helps you prepare for the journey ahead and anticipate any bumps in the road.

Step 9: Preparing the Budget

Your budget should outline all the costs associated with your project. This could include everything from materials and equipment to software, travel expenses, or even your time.

The key here is to be thorough and realistic. Underestimating your budget can lead to stress and delays down the line, so it’s better to overestimate than underestimate.

This shows your professors or any potential funders that you’ve thought carefully about your budget and are making responsible financial decisions.

Take your calculator and start crunching those numbers, and create a budget that will fuel your project to success.

Step 10: Proofreading and Editing

Here’s your chance to make your proposal shine and ensure it’s the best it can be.

Time to check for clarity, coherence, and, of course, those pesky grammar and spelling mistakes.

However, proofreading and editing isn’t just about fixing mistakes. It’s also about improving your writing. It’s about making sure your ideas are clearly communicated, your arguments are compelling, and your proposal is engaging to read.

Remember, your MBA project proposal is a reflection of you and your project. So, make it shine. Make it clear. Make it compelling. And most importantly, make it yours.

Sometimes you may need extra eyes to proofread and edit your proposal to avoid confirmation bias. It is not unethical to have a professional editor go over your work and correct errors and mistakes. Today, you will easily find writers and editors offering to help with writing MBA project online. While at it, remember to verify that the proofreaders and editors are qualified and knowledgeable to avoid last minute frustrations.

How To Create Map in ArcGIS Pro

How To Create Map in ArcGIS Pro

GIS involves utilization of tools in the GIS software to manage and analyze geographic(spatial) data. It mostly involves collection of data, processing and interpretation with an aim of creating maps. Other than possessing problem solving, team work, excellent communication and strong analytical skills; GIS Analysts must have knowledge of some basic geoprocessing tools. Geoprocessing tools are very essential when one wants to execute a certain analysis using the GIS software such ArcGIS Pro.

Map making mostly involves defining the core theme of the plan, defining type of map chosen to convey the theme, detecting the target audience and framing the finest way to organize, merge and configure the features to efficiently communicate the map’s intended message.

Map making in ArcGIS Pro involves five steps, namely:

  1. Preparation
  2. Mapping
  3. Labelling
  4. Layout
  5. Proof checking

To minimize errors, the analyst must follow these steps chronologically without skipping any step.


Step One: Preparation

This is the most important in map making as it lays the foundation on the kind of output(map) that will be generated. It gives a room for the analyst to decide:Where they are going to map? What kind of scale and extend they will apply? Setting and choosing appropriate zone and coordinate system.

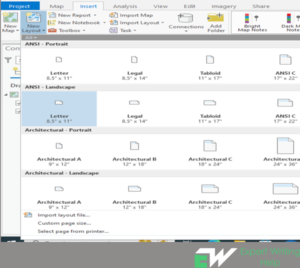
Firstly, Start the Software (ArcGIS Pro) and sign in. Move the cursor to the start page and click open another project, create a new layout guided by the chosen dimensions hence printing won’t be problematic. To do this, move the cursor to “new layout icon”, click and navigate to your desired size to be printed. Secondly, the empty map should be added to the layout and setting its position and size. The next step involves activation, panning and zooming of the map to desired extent and scale. To activate, in the contents pane, right click the map frame and click activate.

In addition, open the map properties and apply the set scale as a reference scale, insert a layer template, save the edits and close the map activation. Final step preparation stage involves downloading data enclosed by the defined extent and scale: and noting down the source of the data for later reference.

Move the cursor on the ribbon and click view, click reset panes and choose reset panes for mapping. This will make sure catalog and contents panes remain open.  In the content pane, right click layout and click properties. On the layout properties icon, click general tab and makes the desired changes by renaming it.

Guides are useful in aligning elements on the layout. To add guidelines, right click the ruler ribbon and click add guides. In the guides dialog box, navigate to orientation and choose both. Navigate again to placement drop down arrow choose offset from edge. Choose your desired value in the margin box and click Ok.

how to create map using ArcGIS Pro
Image 1: Showing the process of choosing a desired layout.


Step Two: Mapping

This step involves adding data into the map as well as removing the unwanted layers as you merge the datasets into a single layer. It is also in this stage that will determine whether you have all the required or need some more datasets. Definition queries can be used to filter out the unwanted data to be displayed on the map.

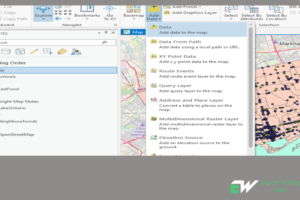
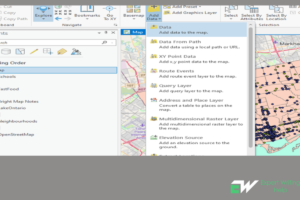
Before adding data to the map, its important to consider the purpose of the map, the accuracy of the data in relation to the message to be conveyed, how dense the dataset is and the age of the data. To add data, move the cursor the “add data” icon, expand and click “add data to the map” > move to where you have saved your data, select the required datasets and click Ok for them to be added in the map as shown in the image 2 &3 below.

ArcGIS Pro Map layout
Image 2: Showing the location of the datasets to be added in the map.
Image 3: Showing how data is added in the map

The next move will be to create/make a new geodatabase file and exporting each of the layers into it and renaming them with new names. To create a geodatabase, in the catalog pane right click folder and click new file geodatabase. Remove the old layers from the map while keeping the new ones. Now symbolization of the data should be carried out to give it a better look/appearance.


Step Three: Labelling

This step is very crucial in map making as it gives maps better looks. First and foremost, turning on of the labelling should be done for the suitable layers.To turn on labels, choose a feature layer in the content pane. On the feature layer click labelling tab. In the layer group click on label. Secondly, create a different label class for every style of text.Thirdly, keep playing with the labelling properties until they meet your desired appearance. Lastly, convert the labels to annotation and ensure your taste is met through editing.


Step Four: Making a layout

This step involves making a map that will be used as a key. To create a new map, move the cursor to insert icon on the window ribbon and click new map. Firstly, insert a new map and choose a suitable coordinate system. To choose a suitable coordinate system, move the cursor to the map properties, click coordinate tab, click Ok to set the coordinate system. Secondly, add the key map you have created to the layout. Thirdly, create a new layout guided by the chosen dimensions hence printing won’t be problematic. The empty map should be added to the layout and setting its position and size. The next step involves activation, panning and zooming of the map to desired extent and scale. In addition, open the map properties and apply the set scale as a reference scale, insert a layer template, save the edits and close the map activation. Add some more data that can explain to the target audience/reader where in the universe they are looking at. Make appropriate symbols and label for the map.


The next move involves inserting cartographic items. To do this, click insert icon and use cursor to move over and clicking on items that you like to insert to your map. Some of these cartographic items that need to be inserted may include: Title of the map, legend, scale bar, north arrow, graticule or grid, source credits, descriptive text, graphs, charts and pictures.

how to create map layout using ArcGIS Pro
Image 4: Showing a final map with legend, scale bar, title and north arrow.


Step Five: Proof reading

This is also very important stage of mapping that should not be skipped at any cost. This stage allows the cartographer to correct some mistakes they may have made during map making. To do this, ensure all the layers necessary are turned on. First the layout must be exported in pdf format for the errors to be seen and corrected on the map. The process has to be repeated for several time to ensure that all errors are fixed.

how to create arcgis pro
Image 5: Showing the prof reading process to ensure there are minimum to no errors in the final output.

Maps can also be created from carrying some spatial analysis. Some the basic of the common analysis may include: Buffering, calculating density by container, carrying out analysis using symbology to classify the data into desired percentages, performing some network analysis such as origin destination cost matrix to determine number of facilities that can be accessed from a chosen point.

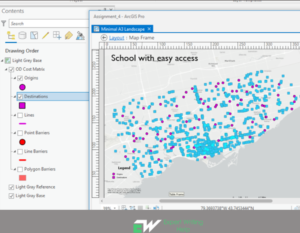
To create a map that shows some facilities that can be accessed from a specific point, origin destination cost matrix can be performed. Move the cursor to the analysis tool > move to network analysis tool and click it > import the datasets in the destination, origin and set the desired parameters > click run to execute the analysis. The output will display some destinations and origin points as shown in a final map in image 5 below.

how to create destination map in arcgis
Image 6: Showing Origin destination map (school with easy access)


This tool is useful in creating new features around other features. To buffer a feature, click the edit > click modify features. In the modify features expand construct > navigate to buffer and click it. Click the template arrow > choose a template feature > in the buffer box type your desired distance to buffer > in the rings enter the number of multiple buffers > check preview and dissolve as well, also specify the shape of the buffer product > in the pane, click buffer.

buffering geoprocessing tool in arcgis
Image 7: Showing buffering geoprocessing in ArcGIS Pro.


Symbology analysis can also be used to create specific map that classify the data into a specific class. For instance, population data can be classified into upper and lower quartile to create a specific map like the one shown below.

arcgis pro map assignment
Image 8: Showing the highest quartile of population neighborhood in terms of fast food restaurants


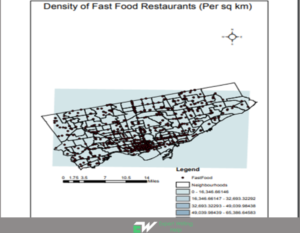
Higher and lower density areas in a dataset can easily be identified through creating an area density map. For instance, in the map below, the density of fast food restaurants in Toronto is calculated using container approach. The output is as shown in image 9 below.

Image 9: Showing density of fast food restaurant in Toronto(per sq km).

Get Assistance with Creating Map in ArcGIS Pro from Expert ArcGIS Pro Tutors

Are you stuck with gis lab reports that require you to create maps using ArcGIS Pro? then worry no more. Our ArcGIS Pro assignment help will take you through step by step approach to creating well layout maps. Our expert GIS tutors are conversant with exporting maps, creating map layouts and map frames using ArcGIS Pro. You will also get to learn how to create map in ArcGIS Pro from finest analysts and cartographers online

Ultimate Guide: How To Write Article Review- Format, Types, Tips and Examples

Ultimate Guide: How to Write Article Review:- Format, Types, Tips and Examples

Have you ever read an article and thought, “I’ve got some thoughts on this piece?” Well, that’s where article reviews come in. An article review is a written evaluation of a published piece, where you summarize the content and analyze its strengths and weaknesses. Sounds cool, right?


But why should you care about writing article reviews? Well, they’re not only a fantastic way to sharpen your critical thinking skills but also an excellent opportunity to practice and improve your writing. Plus, they’re a common assignment in academia and can even help you build credibility as an expert in your field!

So, are you ready to become an article review superstar? This blog post has got you covered! We’ll go through the format, types, tips, and examples of article reviews, plus some common mistakes and how to avoid them. By the end of this post, you’ll have everything you need to write an A+.

Get to learn how article review assignment help team deliver A+ quality review assignment  . Let’s get started!


Format: The Blueprint of Your Article Review

A solid structure is the foundation of any great article review. Think of it as a blueprint that will guide you through the process and help you organize your thoughts. Ready to explore the key components? Let’s dive in!


Crafting the Perfect Title and Citation

Kick off your review with an attention-grabbing title that reflects the content of your review. You’ll also need to include the citation of the article you’re reviewing. Remember to follow the appropriate citation style (like APA, MLA, or Chicago) based on your requirements.


Introduction: Hook ’em with a Killer Opening

First impressions matter, so make sure your introduction is engaging and informative. Start with a hook, like a thought-provoking question, an interesting quote, or a surprising fact from the article.


Then, briefly introduce the article’s topic, author, and main argument. And don’t forget to mention the purpose of your review!


Using quotes or intriguing facts to engage readers

For example, if you’re reviewing an article about climate change, you could start with a shocking fact: “Did you know that the last decade was the hottest ever recorded on Earth?” This will instantly grab your readers’ attention and set the stage for the rest of your review.


Summary: Striking the balance between brevity and detail

Next up, provide a concise yet comprehensive summary of the article’s main points. Aim to capture the essence of the piece without drowning your readers in details. Keep it short, sweet, and to the point!


Analysis: Unleashing your inner critic

Now comes the fun part: analyzing the article! This is where you’ll flex your critical thinking muscles and evaluate the strengths and weaknesses of the piece. Discuss the author’s argumens, evidence, and writing style. Are they convincing? Is there anything missting or flawed? Be objective and fair in your assessment.


Conclusion: Ending on a high note

Wrap up your review by summarizing your main findings and offering your final thoughts on the article. What’s the overall impact of the piece? Is it a valuable contribution to the field? Don’t forget to include a call-to-action for your readers, encouraging them to read the article or share their own thoughts in the comments section.

Types of Article Reviews: Know Your Style

Not all article reviews are created equal. Depending on your goal, you might choose a different approach to reviewing an article. Let’s take a look at three common types of article reviews and when to use them:

1.     Descriptive Reviews: Painting the Picture

Descriptive reviews focus on providing a thorough summary of the article’s content. Your goal here is to give your readers a clear understanding of what the article is about and the author’s main arguments. This type of review is ideal when you want to inform your audience about a specific topic without diving too deep into a critical analysis.


For example, if you’re reviewing an article on a new scientific discovery, a descriptive review would help readers grasp the key findings and their implications.


2.     Critical Reviews

Critical reviews go beyond summarizing the content and dive into a deeper evaluation of the article. You’ll assess the author’s arguments, methodology, evidence, and writing style, identifying the strengths and weaknesses of the piece.


This type of review is perfect when you want to offer a well-rounded critique and engage in a meaningful discussion about the topic.


For instance, if you’re reviewing a controversial opinion piece, a critical review would allow you to dissect the author’s arguments and present a balanced assessment.


3.     Comparative Reviews: The Ultimate Showdown

Comparative reviews involve analyzing two or more articles on a similar topic, comparing their approaches, arguments, and conclusions. This type of review is useful when you want to offer your readers a broader perspective on a subject and encourage them to explore multiple viewpoints.


Imagine you’re reviewing articles on different diets, like keto and paleo. A comparative review would enable you to highlight the similarities and differences between the two, helping readers make informed decisions about their nutritional choices.


Real-life examples for each type

  1. For more inspiration, check out these examples of each type of article review:


  1. Links to articles or blog posts that delve deeper into each type

Want to learn more about each type of article review? These resources have got you covered:

Now that you know the different types of article reviews, let’s move on to some tips that will help you excel in your review-writing adventure!

How to Write Article Review Like Expert Writer

Tips: Secrets to Writing an A+ Article Review

Mastering the art of article review writing doesn’t have to be a daunting task. With these tips in your arsenal, you’ll be well on your way to crafting an insightful and engaging review:


Tip #1: Be a thorough reader: why skimming won’t cut it

To write a top-notch review, you need to know the article inside out. Read it carefully, and don’t be afraid to read it more than once. Pay close attention to the author’s main arguments, evidence, and writing style. The better you understand the article, the more informed and effective your review will be.


Tip #2: Note-taking and organization: your secret weapons

As you read the article, take notes on the key points, arguments, and evidence. Jot down any questions, thoughts, or reactions you have while reading. Organizing your thoughts from the get-go will make the writing process smoother and ensure you don’t miss any crucial details in your review.

Tip #3: Authenticity: let your unique voice shine

Don’t be afraid to inject your own personality and writing style into your review. Your readers want to hear your voice and perspective, not a regurgitation of someone else’s thoughts. Be true to yourself, and your review will resonate with your audience.

Tip #4: Fairness: the art of objective analysis

When analyzing the article, it’s essential to remain objective and fair. Even if you don’t agree with the author’s viewpoint, strive to present a balanced assessment of their work. Recognize the article’s strengths and weaknesses without letting your personal biases cloud your judgment.

Tip #5: The polish: editing and proofreading your masterpiece

Before you hit “publish,” take the time to edit and proofread your review. Look for any spelling, grammar, or punctuation errors, as well as any awkward phrasings or inconsistencies in your argument. A polished review will not only be more enjoyable to read but also showcase your attention to detail and professionalism.


Top-notch proofreading hacks

Need some help with proofreading? This YouTube video offers some fantastic tips and tricks to catch those pesky errors and polish your writing to perfection


With these tips in mind, you’re ready to tackle any article review that comes your way. But before you put pen to paper (or fingers to keyboard), let’s take a look at some common mistakes to avoid and examples of great article reviews in action!


Oops! Common Mistakes and How to Avoid Them

Alright, friends, you’ve got the format, types, and tips for writing an amazing article review in your toolkit. But wait, there’s more! To truly rock your review, watch out for these common blunders and learn how to dodge ’em like a pro:


  1. Over-summarizing or under-analyzing

Strike the right balance between summarizing and analyzing. Keep your summary short and sweet, focusing on the article’s main points. Remember, the meat of your review is the analysis and evaluation, so don’t let the summary hog the spotlight!


  1. Forgetting the article’s context or background

Think big picture when reviewing an article. What’s the context or background behind the author’s arguments? Any hidden assumptions or biases? Tackling these aspects in your review will make your analysis richer and more insightful.


  1. Plagiarism pitfalls and how to steer clear

Always give credit where it’s due. Paraphrase or quote the article when needed, and don’t forget to cite your sources according to the proper citation style. Keep your review original and authentic to sidestep plagiarism.


  1. Getting too subjective or biased

Sure, your opinion matters, but keep your review as objective as possible. Don’t let your personal beliefs or biases cloud your judgment. Focus on offering a fair and balanced assessment of the article instead.


  1. Neglecting the importance of a well-structured review

A messy or poorly structured review can be super confusing for your readers. Stick to the format we chatted about earlier, and use clear headings and smooth transitions to guide your readers through your review.


And that’s it.  By dodging these common slip-ups, you’ll be on your way to crafting an article review that’s both engaging and informative. So, let’s roll up our sleeves and start writing!


A Step-by-Step Guide to Crafting Your Own Article Review

Now that you’ve learned the ins and outs of writing a top-notch article review, it’s time to get down to business.


Step 1: Review the article with a critical eye


Start by carefully reading the article you’ll be reviewing. Keep a critical eye on the content, and make sure you fully understand the author’s main points and arguments.


Step 2: Jot down your notes and organize your thoughts

As you read, take detailed notes on the article’s key elements. Organize your thoughts using headings and bullet points, so you can easily refer back to them when you’re writing your review. This will help you create a well-structured and focused piece.


Step 3: Draft your review, following the format and tips we discussed

Once you’ve got your notes and thoughts organized, start drafting your review. Remember the format we covered earlier, and use it as a guide for structuring your piece. Keep the tone engaging and informal, and make sure to follow the tips we discussed to avoid common mistakes.


Step 4: Add some flair with catchy headings, links, and multimedia

To make your review even more engaging and fun, spice things up with catchy headings and subheadings. Add links to other blogs or articles that support your points or offer additional insights. You can even include multimedia like images, infographics, or YouTube videos to illustrate your points and keep your readers hooked!

Step 5: Edit and proofread for a polished final product

Check for typos, grammatical errors, and inconsistencies in style or formatting. Make sure your review flows well and is easy to read. A polished final product will leave a lasting impression on your readers and demonstrate your expertise as a reviewer.


Step 6: Share your masterpiece and engage with your audience

Congratulations, you’ve created an awesome article review! Now it’s time to share your work with the world. Publish your review on your blog or platform of choice, and promote it on social media or through email newsletters. Engage with your audience by responding to comments and encouraging them to share their thoughts and opinions on the article. After all, the best reviews spark lively conversations and inspire further exploration of the topic.

Wrap Up!

With the right format, a clear understanding of the different types of reviews, and some handy tips, you can craft an engaging and informative review that’ll resonate with your audience. Remember to avoid common pitfalls, add some flair with multimedia and catchy headings, and most importantly, have fun with it!

16 Geoprocessing Tools Every GIS Analyst Should Know

16 Geoprocessing Tools To Use In GIS Homework Like GIS Pro

GIS involves utilization of tools in the GIS software to manage and analyze geographic(spatial) data. It mostly involves collection of data, processing and interpretation with an aim of creating maps. Other than possessing problem solving, team work, excellent communication and strong analytical skills; GIS Analysts must have knowledge of some basic geoprocessing tools.

Are you a student or newbie in using GIS software and would like learn to geoprocess like an expert GIS analyst? Well, you are at the right place. In this post, we have compiled an ultimate list of top 16 geoprocessing tools that GIS analysts at our GIS homework help service do use most.

You will learn basics as well as most common ways of processing GIS data that include clipping, buffering, merging, intersecting among others. Our comprehensive list of geoprocessing tools include tools that can be used in ArcGIS and QGIS softwares.

Geoprocessing tools are very essential when one wants to execute a certain analysis using the GIS software such ArcGIS or Qgis. Some of the most common geoprocessing tools that every GIS Analyst should know:

  1. Buffer tool
  2. Clip tool
  3. Merge Tool
  4. Dissolve tool
  5. Intersect Tool
  6. Union Tool
  7. The erase (Different) tool
  8. Spatial join tool
  9. Extract by Mask Tool
  10. Clip Raster Tool
  11. Extract by attributes tool
  12. Reclassify
  13. Project tool
  14. Near
  15. Calculate by Geometry
  16. Near

Buffer geoprocessing tool

This is a reclassification process based on distance inside or without a certain closeness. The output are normally polygons around input features at a given distance. Buffer geoprocessing process works in two ways: Euclidean and Geodesic.

Euclidean measures distances in 2D (Two-Dimensional) cartesian plane whereby the distances are calculated between two destinations on a cartesian plane (flat surface). It is ideal in analyzing distances around polygons that are focused in quite a small area.
Geodesic buffering calculates distances between two location or points on a geoid surface. The methods applied determine the kind of buffers created.

In ArcMap buffering can be performed through the following procedure: Click edit tool followed by clicking the feature where buffering is to be created around> click editor menu and then buffer> type the desired distance in map scale units> Select the target in which the new feature will be created> click ok.

geoprocessing tool
Figure 1: Showing Geoprocessing Buffer Tool


buffering process
Figure 2 Showing buffering process

Clipping geoprocessing in ArcGIS

This is creating a subset dataset from a larger dataset through cutting out a section of a certain dataset using a section or multiple of the features in another dataset. The clipping process is useful in choosing an area of interest or study area during spatial analysis. The clipping layer is always a polygon whereas the input layer can either be a polyline, points or polygons. Clipping can be performed both on vector and raster datasets. For Raster dataset, clipping is done using either graphics, data frame or polygons.

Clipping geoprocessing is as follows:

The first step involves clicking the edit tool on the editor tool bar

Clipping geoprocessing Tool
Figure 3: Showing Clipping geoprocessing Toll


Step two involves selecting the features to be clipped

clipping - geoprocessing tool
Figure 4: Showing the second step in clipping


Step 3 involves typing the input features, output features and the tolerance value. Click the type of clipping operation whether to maintain or discard, then Ok.

3rd step in Clipping geoprocessing
Figure 5: Showing the 3rd step in Clipping geoprocessing

Merge Geoprocessing Tool

Merging in ArcGIS involves combing chosen features of the same layer or multiple layers into a new single feature. The feature must be either from a polygon or a line layer. In addition, also data sets must be from the same data type. The selected feature can either be modified or preserved.

Merging process in ArcMap involves the following process: Clicking the edit tool bar followed by clicking the features you would like to merge. Click the merge tool then click the feature the features will be merged into and finally click Ok to execute the process.

merging tool
Figure 6: Showing merging tool


showing merging geoprocessing
Figure 7: Showing merging geoprocessing.

Dissolve Geoprocessing tool

Dissolving tool generalizes and simplifies boundaries from a more complex to a simple. In most cases this tool adjacent edges on a common attribute values basis. The edges(boundaries) will melts into one only if the neighboring polygons share the similar dissolving attribute.

In ArcMap, dissolving tool can be accessed in the data management tool in the generalization toolset. It involves setting the fields that you would like to dissolve. To perform the dissolving geoprocessing: Click Arctoolbox> data management tool > Generalization > Dissolve > double click it. In the new window pane that appears > input files > output files will be selected automatically > Dissolve > Ok.

location dissolve tool in the Arctoolbox
Figure 8: Showing the location of Dissolve tool in the Arctoolbox


dissolving geoprocessing
Figure 9: Showing Dissolving geoprocessing.


Intersect Tool

This tool calculates a geometric connection of the input features. In most cases, percentages or features of the feature that overlay in all layers or feature classes will be inscribed to the output(product) feature class. While performing this analysis it is advisable that the input features simple one like point, polygon or polyline.

To perform this analysis in ArcMap, go the toolbar > geoprocessing > intersect > enter the input feature, out put feature class, join attributes, tolerance attribute, output type > click Ok.

intersect geoprocessing tool
Figure 10: Showing intersect geoprocessing


Union Geoprocessing Tool

The Union geoprocessing performs calculation of geometric union of whatever number of feature layers and classes. All input feature layers or classes must polygons in order for the output feature class to comprise polygons representative of geometric union of all involvements as well as the all the fields from all the input feature classes. Furthermore, union tool controls the spatial reference, clusters and cracks the features, determines geometric relationsamongst features from all feature classes and inscribes new features to the output.

To perform Union geoprocessing in ArcMap: Go to geoprocessing > navigate to union > click union > input the features > click Ok to execute the analysis.

union geoprocessing
Figure 11: Showing union geoprocessing.


Erase Geoprocessing Tool

Erase tool generates a product feature class by overlapping the input features with the erase features. Only those percentages of the input features falling exterior of the erase features are copied to the product feature class.

To carry out erasing geoprocessing in ArcMap: Go to geoprocessing> navigate to search > type and search erase geoprocessing tool > Enter input features > enter erase features > enter output feature class > enter tolerance > click Ok to execute the analysis.

Erase geoprocessing tool
Figure 12: Showing erase geoprocessing.


Spatial Join Geoprocessing Tool

This tool joins attributes from one feature to another grounded on the spatial connection. The target features and the merged attributes from the combined features are inscribed in the product feature class. All attributes of the merge features are added to attributes of the target features and cliched over to the output feature class. In the process attributes to be written to the output can be defined.

Spatial join analysis can be carried out in ArcMap as follows: Click on the geoprocessing> navigate to search > type spatial join tool > click the tool > enter the target feature, join features, click Ok to execute the analysis.

spatial join geoprocessing tool
Figure 13: Showing spatial join geoprocessing.


Extract by Mask

This is a spatial analysis function that extracts the cells of a raster that correspond to the areas defined by a mask. Attributes from the input raster will be carried over to the output raster attribute table.

To perform extract by mask analysis in ArcMap, the following steps are followed: Click the geoprocessing and navigate to the search > type extract by mask > click the tool> input the Raster data, input the feature mask data, enter the output raster > Click Ok to execute the function.

Showing Extract by Mask Analysis
Figure 14 Showing Extract by Mask Analysis


Clip Raster Geoprocessing

The Clip Raster tool permits the extraction of a percentage of a raster dataset on the basis of a template extent. The clip product comprises of any pixels that interconnect the template extent.

Clip Raster geoprocessing is carried out in ArcMap as follows: Enable image analysis Toolbar > image analysis > select the Raster to clip > enter polygon boundary to clip to > Click clip icon > click save to export Raster.

Clip Raster geoprocessing tool
Figure 15: Showing Clip Raster geoprocessing


Extract by Attributes Geoprocessing

This function involves extraction of the cells of a raster on a logical query basis. Attributes from the input raster dataset are normally passed over to the product raster attribute table. Liable on the property presence documented, part of the attribute values may require to be recalculated.

In ArcMap, extract by attribute analysis can be performed as follows: Click on geoprocessing > Navigate to search and type “extract by attributes” > Navigate to the tool > enter input raster, enter the “where value cluster”, enter the output raster > click Ok to perform the analysis.

Showing the extract by attributes geoprocessing
Figure 16: Showing the extract by attributes geoprocessing.

Figure 15: Showing the extract by attributes geoprocessing.

Reclassify geoprocessing tool

Reclassify tool deals with values in a raster. The tool reclassifies the values in a raster. It uses some parameters such as “classify or unique” generates map based on the values of the input raster dataset.
Reclassify geoprocessing can be performed as follows in the ArcMap: On the geoprocessing navigate to search > enter “reclassify” > click on the tool analysis > enter the input raster, enter the reclass field, enter reclassification (whether unique or classify), enter the output raster > click Ok to execute the function.

reclass geoprocessing tool
Figure 17: Showing reclass geoprocessing

Project Geoprocessing Tool

Project geoprocessing tool is useful in projecting spatial data from one coordinate system to another. To perform this in the ArcMap, the following steps are followed: Go to Arctoolbox > Data management > projection and transformation > project > enter the input dataset or feature class, output dataset or feature class, output coordinate system > Click Ok to execute the function.

showing project geoprocessing tool
Figure 18: Showing project geoprocessing tool.

Near geoprocessing Tool

Near(analysis) tool helps the GIS Analyst to compute distance and extra nearness info between the input features and the nearby feature in another layer or feature class. To perform “near analysis” in ArcMap, the following steps are useful: On the geoprocessing navigate to the search > type “near analysis” > On the appeared tab enter the: Input features, near feature, enter the method and click Ok to execute the function.

Showing near(analysis) geoprocessing
Figure 19 Showing near(analysis) geoprocessing

Calculate by geometry geoprocessing tool

Calculate by geometry can be utilized by any GIS analyst when they want to add info to a feature’s attribute fields in place of geometric features and location of each feature like area or length, elevation and x-y coordinates.

To carry out “calculate by geometry” in ArcMap, the following steps can be followed: go to the geoprocessing and navigate to search > click and type “calculate by geometry” > click in the “add geometry attributes”> enter input features, geometry properties, length unit, area unit > click Ok to execute the function.

Showing calculate by geometry geoprocessing
Figure 20 Showing calculate by geometry geoprocessing


References
Introduction to arcgis pro (no date) Introduction to ArcGIS Pro-ArcGIS Pro | Documentation. Available at: https://pro.arcgis.com/en/pro-app/latest/get-started/get-started.htm (Accessed: April 3, 2023).

Nursing Leadership Practicum Project Ideas

7 Greatest Nursing Leadership Practicum Project Ideas

Welcome, dear reader, to a blog post that will tickle your funny bone and ignite your imagination. If you’ve landed on this page, you’re likely a nursing student or a passionate healthcare professional seeking inspiration for your MSN or DNP nursing leadership practicum project. Now fasten your seat belts, sweetie, because you’re in for a ride that will have you in (laugh-induced) stitches!

Before we dive into the entertaining world of nursing leadership practicum project ideas, let’s take a moment to appreciate the hard work and dedication that nurses bring to their profession.

Nurses are the backbone of the healthcare system, and their leadership skills are crucial in ensuring the best possible care for patients. So, hats off to you, future nursing leader!

Leadership practicum projects are designed to improve healthcare delivery in a community. During your practicum you will learn and be guided by a preceptor, who is an accomplished healthcare leader, over three semesters.

In addition, it is advisable to seek help with writing DNP leadership practicum projects to assist you in writing and editing the final manuscript.

Below are some nursing leadership practicum project ideas to kickstart your writing journey. Hope you enjoy!!

1. Nurse Sherlock: The Great Hospital Mystery

Who doesn’t love a good whodunit? Your mission, should you choose to accept it, is to identify gaps and inefficiencies in your hospital’s day-to-day operations. Put on your detective hat and become Nurse Sherlock, solving the great hospital mystery!

Create a detailed report of your findings and propose innovative solutions to enhance patient care and streamline hospital processes. Your engaging presentation will leave your colleagues and supervisors in awe of your deductive abilities!

“The art of nursing, as now practiced, seems to be expressly constituted to unmake what God had made disease to be.” – Florence Nightingale


2. The Nursing Escape Room: A Team-Building Extravaganza

In this thrilling, interactive project, you’ll design an escape room experience that tests your nursing team’s clinical knowledge, critical thinking, communication, and collaboration skills.

Create challenging puzzles and scenarios related to nursing practice, and watch your colleagues put their heads together to escape within the allotted time. This project not only fosters team camaraderie but also reinforces essential nursing concepts in a fun and engaging way!


3. The Great Handwashing Challenge: A Hygienic Showdown

They say cleanliness is next to godliness, and in nursing, it’s also next to patient safety! In this project, organize a handwashing competition among staff members to promote proper hand hygiene in the workplace.

Use humor and creativity to design entertaining challenges that test participants’ handwashing skills, such as a “handwashing relay race” or a “germ-free obstacle course.” Don’t forget to offer prizes for the most exemplary handwashing performance!

“Washing one’s hands of the conflict between the powerful and the powerless means to side with the powerful, not to be neutral.” – Paulo Freire


4. Nurse Idol: Showcasing Talent Beyond Scrubs

Nurses are more than just skilled healthcare professionals – they’re also talented individuals with diverse interests outside the hospital walls. Organize a talent show that allows your nursing colleagues to showcase their hidden talents, from singing and dancing to poetry and painting.

This project not only builds camaraderie among staff but also helps to humanize the nursing profession by celebrating the unique qualities that each nurse brings to the table.


5. The Mentor Matchmaker: Pairing New Nurses with Seasoned Pros

Nursing can be overwhelming, especially for those just starting in the profession. In this project, create a mentorship program that pairs experienced nurses with newbies, providing invaluable guidance and support as they navigate the challenges of their new roles.

Design a fun and interactive “speed mentoring” event where potential mentor-mentee pairs can meet, chat, and find their perfect match. After all, a little guidance goes a long way in shaping the nursing leaders of tomorrow!

“A good teacher can inspire hope, ignite the imagination, and instill a love of learning.” – Brad Henry


6. Nursepreneurs: Pitching Innovative Healthcare Solutions

Have you ever dreamed of becoming the next healthcare industry mogul? In this project, gather a group of nursing colleagues and host a “Shark Tank”-style competition where participants pitch their innovative healthcare solutions to a panel of expert judges.

This fun and engaging event encourages nurses to think outside the box and develop creative solutions to address real-world healthcare challenges. Who knows – you might just discover the next big thing in nursing!


7. Designing a Public Health Initiative

Nurses have a crucial role in promoting community health. Creating a community health nursing program targeted at a certain population is a great focus for your nursing leadership practicum assignment.

To do so, one option is to develop a program with the goals of reducing the prevalence of chronic diseases, encouraging healthy behaviors, and educating the public about the importance of maintaining good health.

As a leader, your initiative to better the community’s health will speak volumes about your leadership skills.

Here are some of the community nursing research topics to guide you develop a practicum program.


Innovative Nursing Practicum Project Ideas: Possible Sources

You know what they say, necessity is the mother of invention! And when it comes to coming up with ideas for nursing leadership practicum project, you might be scratching your head wondering where to start. But don’t worry,  I’ve got you covered! Let’s dive into some of the best places to look for nursing practicum project ideas.

  1. First up, have you considered talking to your clinical mentor or preceptor? These experienced nurses are a wealth of knowledge and may be able to suggest a project idea based on your interests or the needs of your clinical setting.
  2. Next, why not browse through some nursing journals? There are tons of great publications out there, covering everything from clinical practice to research. You might find a topic that catches your eye and inspires you to explore it further.
  3. If you’re more of a visual person, how about checking out some nursing conferences or webinars? These events often showcase the latest and greatest in nursing research and practice. Plus, attending a conference or webinar is a great way to network with other nurses and make valuable connections.
  4. Another source of inspiration is your own clinical experiences. Think about any challenges you’ve faced or interesting cases you’ve encountered. Is there a particular issue or area of care that you’re passionate about?
  5. These personal experiences can often lead to great project ideas. You can also take a look at what’s currently trending in nursing. Are there any hot topics or emerging trends that you find interesting? Maybe there’s a new technology or treatment that you think would be worth exploring further.
  6. Outside of the nursing world, there are plenty of other sources of inspiration as well. For example, you might find some great ideas by looking at what’s happening in related fields, such as medicine, public health, or social work. Or, you might draw inspiration from a completely different area altogether, such as art, music, or literature.
  7. How about engaging a professional nurse writer. You will be surprised just for a few dollars you can hire a nursing paper writer to assist you develop innovative practicum ideas or even improve your existing idea into a nursing leadership practicum project.
  8. Last but not least on this list, don’t forget about your fellow nursing students! Brainstorming with your classmates can be a great way to generate new ideas and get a fresh perspective on your project.

So there you have it, eight sources of inspiration to help you get started on your Nursing Practicum Project. Remember, the key is to find a topic that you’re passionate about and that will allow you to make a real impact on patient care.

Always ensure that your practicum idea is impactful and innovative. It may lead to future employment in your practicum site or you may have an opportunity to present it internationally.

Happy brainstorming!


From Idea to Impact: Navigating the Wild World of Nursing Practicum Projects!

Now that we’ve talked about some sources of inspiration for your Nursing Practicum Project, let’s dive into some of the challenges you might encounter along the way.

The time crunch: Between your clinical rotations, coursework, and personal life, finding the time to work on your project can be a real challenge. But don’t throw in the towel just yet! Here are a few tips to help you manage your time:

  • Prioritize your tasks and make a schedule. Try breaking your project into smaller, more manageable chunks and tackle them one at a time.
  • Use your free time wisely. Instead of scrolling through social media or binge-watching your favorite show, take 30 minutes to work on your project.
  • Take breaks! It’s important to rest and recharge so you don’t burn out.

Another common challenge is coming up with a project idea that’s both feasible and impactful. You want to choose a topic that’s within the scope of your clinical setting and resources, but that also addresses a real need or issue in patient care. To overcome this challenge, try brainstorming a list of potential topics and then doing some research to determine which ones are most feasible and impactful.

The next up is that you might encounter  a challenge of getting buy-in from your clinical preceptor or mentor. It’s important to get their support and approval for your project, but they may have different priorities or ideas about what’s important to focus on. Be prepared to communicate the value of your project and explain how it will benefit patients and improve outcomes.

Finally, one of the biggest challenges of any project is staying motivated and focused. It can be easy to get bogged down in the details or to feel like you’re not making progress fast enough. One way to stay motivated is to set clear goals and deadlines for yourself, and to hold yourself accountable for meeting them.

Wrap Up!

In conclusion, nursing leadership is no laughing matter, but that doesn’t mean we can’t have a little fun while developing our skills! These nursing leadership practicum project ideas are sure to entertain, engage, and ultimately, empower you to take charge of your nursing career. Remember, as the legendary Florence Nightingale once said:

“I attribute my success to this – I never gave or took any excuse.” – Florence Nightingale

So, go forth and conquer, future nurse leader! And don’t forget to keep a sense of humor along the way.

Portfolio Management Assignment Example

Executive Summary 

The objective of this study is to evaluate the effectiveness of different companies in the stock market. Project portfolio management is an important activity that influences the business units’ strategies and thus investment decisions. The study focuses on ascertaining the optimality of the project portfolio decisions by evaluating how they are formulated and managed. Besides, the systematic risk is determined by the macroeconomic conditions and financial systems. This report provides risk-return analysis by utilizing the Markowitz portfolio theory, the return on investment, expected return rate, variance, and standard deviation. Moreover, the study evaluates the relationship between the returns and the market portfolio by using the security market line(SML), beta coefficient, residual variance, correlation, and determination coefficient. The report uses the following selected portfolio: Best Buy Co., Microsoft, Boeing Company, and Wal-Mart Stores, which constitutes actively selected portfolio(P1); CIT Group, MetLife, NVIDIA Inc., and American Express Company, which forms randomly selected company (P2); while the passive selected portfolio(P3) includes AT&T, Pennant Park Investment Inc., Medley Capital Corp., and Hercules Capital.

1.1 Policy Statement 

The stock purchased based on the performance in the market where actively selected portfolios were considered. However, the randomly selected portfolio is essential in making an optimal decision for investment purposes. This is due to the effect of portfolio theory that allows for portfolio diversification to minimize the risk while maximizing the returns for risk-averse investors. Furthermore, the passive portfolio is useful for the purposes of evaluating the effectiveness of the selected investment appraisal techniques.

2.0 Strategy Implementation, the motive behind a particular stock selection and industry analysis

This section involves a description of selected companies’ revenues, financial solvency, and financial position. The reason for selecting such companies in my portfolio are outlined in this section—the explanation based on the portfolio as P1, P2, or P3 discusses below.

2.1 An actively selected portfolio (P1)

P1 constitutes for companies, namely Best Buy Co., Microsoft, Boeing Company, and Wal-Mart Stores. Best Buy Co.(BBY) is a competitive provider of technological products, services, and solutions globally. The company provides affordable consumer products to different classes of consumers, small and medium businesses, either through their stores or online. The company has developed a variety of innovations to ensure all consumers globally are served. This is achieved by using a website platform(BestBuy.com), Best Buy App, or by use of engagement of company agents (Geek Squad Agents). The company’s operations are diversified across the world, with its brands traded in different countries with its headquarters in Richfield, Minnesota, U.S. The company is ranked as the best performing company in innovation, evident by its development of a unique chain of stores. The company reported an increase in revenues as of F.Y. 2020 by 1.8% increase from $42.88 billion, while the net income increase by 5.5% from $1.46 billion as of F.Y. 2019 to $1.54 billion for F.Y. 2020, which exceeds the analysts forecasted net income of $1.53 billion which is an increase by 0.65%. Moreover, the company assets increased by 20.85% from $12.9 billion in 2019 to $15.59 billion as of F.Y. 2020. The second company under P1 is Microsoft Corporation(MSFT). MSFT is one of the largest multinational companies dealing in proprietary software for various kinds of computer technology. Microsoft’s financial results have remained very positive for the company over the years. For the fiscal year 2020, total revenues amounted to over $ 143.02 billion, an 13.65% increase over the year before. Fundamental indicators are also very stable and positive. The debt load of the company is extremely low – the Debt / Equity ratio, which determines the debt-to-equity ratio, is only 1.31. ROE 8.82% and ROA is 0.65%. The yield of the company’s securities is higher than in the industry. Thus, the company and industry’s diluted earnings per share are $ 6.20 and $ 1.97, respectively, with a profitability ratio of 30.96%. The third company for P1 is Boeing Company(B.A.) and is the world’s largest aviation, space, and military equipment in the third quarter. The company received $ 76.56 billion for the F.Y. 2019, adjusted net income per share was $ 2.72. At the end of 2019 year, Boeing expects revenue in the range of $ 90.5- $ 92.5 billion and a profit of $ 9.9- $ 10.1 per share. Boeing has significantly strengthened its position in the civil aircraft industry by expanding the line of popular 737 aircraft and Airbus’s failure with sales of the A380. According to Boeing General Director Dennis Muilenburg, in the past quarter, Boeing put record 202 commercial aircraft and increased 737 MAX aircraft production. The last company in P1 is Walmart Inc.(WMT), an American company that manages the world’s largest wholesale and retail trade network operating under Walmart’s trademark. Its earnings per share(EPS) is 6.93, while the P.E. Ratio is 17.41. This is implying a positive dividends performance for the company in the industry. Simultaneously, despite the effect of a very high base, the retail giant is steadily growing, and almost every quarter, its revenues increase by 0.5-2%. Its shares rise in price by 2.5%.

2.2 A randomly selected company (P2)

The second portfolio includes such companies as CIT Group, MetLife, NVIDIA Corporation, and American Express Company. Citigroup Inc is one of the largest international financial conglomerates. The conglomerate’s basis is Citibank, founded in 1812 and is one of the four largest U.S. banks. Citigroup is a large financial corporation, which has many financial units that carry out international activities, working in about 140 countries around the world. Now the company employs about 250 thousand employees. The approximate cash equivalent of Citigroup assets is 1.75 trillion dollars. MetLife Inc. is the leading international holding in the field of insurance and pensions. Its revenue increased by 9.5% to $ 18.7 billion, and net profit jumped by almost 2/3 – to $ 2.16 billion, while the previous year the figure did not exceed 1.33 billion. Earnings per share amounted to 1.87 dollars per share against 1.14 dollars a year earlier. Such results were much better than the market forecasts – average investors’ expectations for revenue were $ 17.8 billion, and for operating profit per share, $ 1.41 (actual value is $ 1.44). As a result, the company’s shares at the opening of trading on the day following the report’s publication grew by 0.6% to $ 52.10. NVIDIA Corporation is a leading American company dealing in graphics accelerators and processors and developer of system logic. Over the years, the share of NVIDIA in the market of discrete graphics cards has grown from 70.5% to 72.5%. AMD’s share decreased from 29.5% to 27.5%. NVIDIA’s shares are growing rapidly, and the “mania of mining,” which will bring big profits to video card manufacturers, plays an important role in this. Today NVIDIA shares may seem expensive, but investors should understand that the chip manufacturer has enough trump cards in its sleeve. This year, analysts forecast an increase in NVIDIA revenues and profits by 19% and 20%, respectively. The company has a lot of development opportunities. Although its shares may temporarily slow down or fall in price, they have enough potential for long-term growth. Finally, American Express Company (Amex) is an American financial corporation that provides mainly consumer finance services for the issue and maintenance of payment and credit cards. American Express works with both individuals and legal entities. In the world, the number of branded cards issued by the company is 88 million pieces, and their turnover for nine months of 2016 exceeded $ 750 billion. We expect that the company’s ROE will exceed 25%, while the result of 2017, according to our estimates, should be lower than the result of the 2016 year due to one-time incomes received in the past year.

2.3 The passive selected portfolio (P3)

For this portfolio, the selected companies include AT&T, Medley Capital Corporation, Pennant Park Investment Corporation, and Hercules Capital. The first company in P3 is AT&T. This is a telecommunication company whose headquarter is in Dallas, Texas, in America. The company is the largest global telecommunication company that provides both local and regional telephone services. The company is also the largest supplier of direct satellite broadcasting in the U.S. through DirecTV. It takes 18th place in the list of the largest cellular operators in the world with 135 million subscribers. It has the highest dividend yield among Dow Jones components – about 5.2%. The company successfully develops, generates solid cash flows, and carries out buyback programs. In the first quarter of 2014, earnings per share increased by 11%. Free cash flow for shareholders was $ 3 billion. Dividends for the first quarter were $ 0.46 per share; they steadily increased during the last decade. Medley Capital Corporation is an investment company whose objective is to generate income while investing in capital products either directly through lending or buying securities from private companies in North America. The corporation has helped develop small and medium companies to expand their operation through financing or acquisition. The majority of its investment assures warrants and other beneficial equity participation characteristics, which the company uses as a strategy to achieve its positive investment returns. The company’s total value of the investment has been growing with the end of F.Y. 2017 amounts to $835.9 million. This is associated with over 68 portfolio investments in different companies with senior secured loans account 67% as first-lien, senior secured lien amounts to 12.7%, while warrants or equities constituted 20.3%. The next company is PennantPark Investment Corporation. From inception in 2007 to the end of 2017, PennantPark deployed approximately $7 billion into over 500 companies with more than 180 sponsors. The company operates with different subsidiaries with PennantPark Investment Corporation and PennantPark Floating Rate Capital, Ltd., Forming the company’s publicly traded businesses. As of the end of the financial year 2016, the company had invested over $229.3 million in different portfolios with a yield of 11.2% of the investment. Finally, Hercules Capital is among the P3 companies selected. The company has been growing with different motives as driven by the vision of serving the needs of entrepreneurs and public investors, as highlighted by the CEO and the founder chairman of the company in the year 2003. The company strives for alternative investment opportunities that stimulate a good venture in the world market. To achieve the strategy, built of Hercules Capital, which was publicly traded were essential and consequently led to listing in NYSE as a Business Development Company(BDC) as an enterprise having an excess value of $1.6 million, with a market cap of $1.0 million. The company is globally recognized as the largest non-bank source of financing for entrepreneurs to accomplish their goals and expand their capital base.

3.0 Portfolio Analysis

This section provides an in-depth analysis of the portfolio for purposes of evaluating the portfolio Risk, Return, variance, and standard deviation while making a comparison with other portfolios, that is, P1, P2, and P3. Under each type of portfolio, the selected stocks are analyzed using different approaches. It is noted that the selected stock in each portfolio varies from others since they were picked from different sectors in the stock market. The data used for analysis utilizes the financial year 2020 historical data obtained from the website. The following is my actively selected portfolio(P1):
Name of Company Company’s Appreciation Closing  prices (2020), $ Number of shares Position $ Proportion of Share in portfolio
Best Buy BBY 115 259 19471 1.8%
Microsoft MSFT 232 7560 610260 56.8%
Boeing BA 214 565 188427 17.5%
Walmart WMT 148 2830 256260 23.9%
Total 1074418 100.0%
Calculating portfolio parameters  To effectively compute the portfolio parameters, return and risk of the portfolio, the study utilizes the weekly prices uploaded from historical data of each stock and S&P index for the financial year 2020. The changes in parameters and the entire portfolio, thus calculated for the report analysis.
Prices ($) Changes (%)
Date BBY MSFT BA WMT S&P BBY MSFT BA WMT S&P
10/12/2020 119.35 219.66 167.35 144.71 3462.25
10/19/2020 118.21 216.23 167.36 143.85 3451.75 -0.96% -1.56% 0.01% -0.59% -0.30%
10/26/2020 111.55 202.47 144.39 138.75 3264.75 -5.63% -6.36% -13.72% -3.55% -5.42%
11/2/2020 123.06 223.72 157.74 145.77 3500.75 10.32% 10.50% 9.25% 5.06% 7.23%
11/9/2020 114.30 216.51 187.11 150.54 3582 -7.12% -3.22% 18.62% 3.27% 2.32%
11/16/2020 119.14 210.39 199.62 150.24 3554.25 4.23% -2.83% 6.69% -0.20% -0.77%
11/23/2020 112.63 215.23 216.50 151.60 3636.5 -5.46% 2.30% 8.46% 0.91% 2.31%
11/30/2020 108.86 216.21 213.01 152.64 3660.5 -3.35% 0.46% -1.61% 0.69% 0.66%
The expected returns are measured from weekly returns. The risk element of stock or portfolio is measured in terms of standard deviation from the portfolio theory. Therefore utilizing the above stock parameters and the S&P index parameters, we can compute the expected returns and the standard deviation.
Company Share in portfolio Expected Returns(Ri) Variance Standard Deviation  (s)
Best Buy 1.8% -1.31% 0.39% 6.24%
Microsoft 56.8% -0.23% 0.28% 5.31%
Boeing 17.5% 3.45% 1.02% 10.12%
Walmart 23.9% 0.76% 0.08% 2.75%
S&P 0.80% 0.14% 3.81%
Calculating the Risk and Return for Portfolio The purpose of creating a portfolio by investors is to achieve optimal investment by diversification of non-systematic risks. The comparison of average risk and return is essential in analyzing a well-performing stock and shares’ sensitivity to market parameters. To determine our stock’s performance with respect to the S&P index, we compute the correlations between the stocks.
  BBY MSFT BA WMT
BBY 1.000 0.514 -0.424 -0.237
MSFT 0.514 1.000 0.124 0.359
BA -0.424 0.124 1.000 0.934
WMT -0.237 0.359 0.934 1.000
The portfolio risk is given by the formula; RP= SWi *Ri Where Wi  is the weight of stock i, Ri  is the  returns stock i Table 1
Company Share in portfolio Expected Returns(Ri) Wi*Ri
Best Buy 1.8% -1.31% -0.024%
Microsoft 56.8% -0.23% -0.128%
Boeing 17.5% 3.45% 0.604%
Walmart 23.9% 0.76% 0.182%
RP 0.634%
The return our portfolio(Rp) is 0.634%. This imply that, our portfolio is not good since it is less than  the S&P index (1.83%). To evaluate if our portfolio is optimal is calculate the portfolio risk. The portfolio risk as measured by the standard deviation is computed as follows. Step 1: Determine the weights of the stock Step 2: Determine the Expected returns The first two steps presented in above table 1. Step 3: Establish Variance Covariance Matrix
  BBY MSFT BA WMT
BBY 0.00334 0.001908 0.000926 0.000643
MSFT 0.001908 0.002418 0.001914 0.000965
BA 0.000926 0.001914 0.008785 0.001978
WMT 0.000643 0.000965 0.001978 0.000648
Step 4: Compute the standard deviation The portfolio variance from the above computation is given by 0.001947. The standard deviation is the square root of portfolio variance, that is, 0.044128. Therefore, comparing to S&P index of 1.83%, our portfolio is better off and thus less risky than the S&P index.

3.1 Sharpe ratio (SR)

This is a measure of excess return over a unit of risk.
Company Expected Returns(Ri) Risk(s) Risk-free Rate(Rf) Sharpe Ratio(SR)
Best Buy -1.31% 6.24% 0.1% -22.7%
Microsoft -0.23% 5.31% 0.1% -6.1%
Boeing 3.45% 10.12% 0.1% 33.1%
Walmart 0.76% 2.75% 0.1% 24.1%
Portfolio 0.63% 0.04% 0.1% 1213.6%
S&P index -1.10% 4.80% 0.1% -25.0%
Using this analysis, investors should choose stock with a higher SR since it assures a higher excess return for every unit of risk undertaken. Therefore, in our portfolio, Boeing is the optimal choice.

3.2 Markowitz Portfolio

Markowitz’s portfolio theory provides a trade-off mechanism for risk tolerance and reward expectations for a given portfolio taking into account the goal of maximizing the returns at a minimum level of risk while diversifying the other securities. The theory assumes that investors are risk-averse and prefer less risky portfolio for any given returns(Mangram, 2013). Using this theory, the analysis utilizes efficient frontiers of a portfolio where the only portfolio under feasible points is considered optimal. To effectively make this analysis, the report takes a randomly selected portfolio and tries to establish the maximum return of the portfolio. First, I compute the individual stock’s expected returns as shown below. Computing the Individual stock risk and return

Step 1: Determine the expected returns

Prices ($) Changes (%)
Date CIT MET NVDA AXP CIT MET NVDA AXP
10/12/2020 25 39.28 552.46 104.91
10/19/2020 31.3 40.94 543.61 100.98 25.20% 4.23% -1.60% -3.75%
10/26/2020 29.45 37.85 501.36 91.24 -5.91% -7.55% -7.77% -9.65%
11/2/2020 31.97 40.48 582.48 96.69 8.56% 6.95% 16.18% 5.97%
11/9/2020 34.35 44.74 531.88 114.99 7.44% 10.52% -8.69% 18.93%
11/16/2020 34.6 45.87 523.51 112.58 0.73% 2.53% -1.57% -2.10%
11/23/2020 34.46 47.45 530.45 120.59 -0.40% 3.44% 1.33% 7.11%
11/30/2020 34.41 46.91 535.6 119.93 -0.15% -1.14% 0.97% -0.55%
Company Expected Return (Ri) Weight(w)
CIT 4.56% 0.8792
MET 2.54% 0.0000
NVDA -0.44% 0.0000
AXP 1.91% 0.1208
Total 100%

Step 2: Computing the Covariance matrix

  CIT MET NVDA AXP
CIT 0.002364 0.002565 0.001795 0.003375
MET 0.002565 0.003249 0.001268 0.004527
NVDA 0.001795 0.001268 0.006296 0.000461
AXP 0.003375 0.004527 0.000461 0.007329

Step 3: computing the portfolio risk and standard deviation

Portfolio return is 0.0424346, it is noted that the initial portfolio return equivalent to zero since the weights of stocks are zero. The calculated portfolio risk is equal to 0.002486 implying a minimum risk, and good investment opportunity. To conclude the comparison, using the same criteria, I analyzed the passive portfolio. The passive portfolio comprise the stock of T, MCC, PNNT, and HTGC.
Prices ($) Changes (%)
Date T MCV PNNT HTGC T MCV PNNT HTGC
10/12/2020 27.33 23.11 3.16 11.63
10/19/2020 27.82 24.35 3.08 11.53 1.79% 5.37% -2.53% -0.86%
10/26/2020 27.02 24 2.91 11.2 -2.88% -1.44% -5.52% -2.86%
11/2/2020 27.44 23.35 3.02 11.4 1.55% -2.71% 3.78% 1.79%
11/9/2020 28.91 23.46 3.29 12.43 5.36% 0.47% 8.94% 9.04%
11/16/2020 28.32 24.44 4.26 12.89 -2.04% 4.18% 29.48% 3.70%
11/23/2020 29.03 24.19 4.6 13.61 2.51% -1.02% 7.98% 5.59%
11/30/2020 28.87 24.69 4.48 13.54 -0.55% 2.07% -2.61% -0.51%
Covariance Matrix
  T MCV PNNT HTGC
T 0.000681 -0.000079 0.000033 0.000702
MCV -0.000079 0.000756 0.000687 -0.000103
PNNT 0.000033 0.000687 0.009792 0.002293
HTGC 0.000702 -0.000103 0.002293 0.001387
Portfolio Risk and Standard deviation The portfolio return equals 0.009509, while the portfolio risk is equal to 0.000684. This depicts a lower risk for the portfolio.

3.3 Beta factor

The beta factor is an essential measure of the sensitivity of securities concerning the market. The factor is useful in the CAPM model as it describes the relationship between expected return and the overall systematic risk. This model is critical in the valuation of risky securities and making optimal decisions by risk averse investors (Bradfield, 2003). In essence, the beta depicts the swings in the market and the appropriate response for investment in such a security. The beta values of my portfolio are the calculated below.
Share in portfolio Beta
Best Buy 1,80% 0,14
Microsoft 56,80% 1,32
Boeing 17,50% 1,63
Walmart 23,90% 0,48
Beta portfolio 1,15
Share in portfolio Beta
CIT Group 2,44% -1,02
MetLife 16,36% 1,02
 NVIDIA 52,32% 1,53
American Express Company 28,87% 0,97
Beta portfolio 1,22
Share in portfolio Beta
AT&T 99,27% 0,42
Medley Capital Corporation 0,12% 0,35
PennantPark Investment Corporation 0,19% 1,43
Hercules Capital 0,42% 0,44
Beta portfolio 0,42
Beta values have different implications as they depict the stock’s volatility with respect to the whole market. If the value is 1, the portfolio sensitivity moves like that of the market, while a higher beta ( more than 1) implies greater volatility and high risk and vise versa for a lower beta. Besides, a higher beta implying high volatility of the stock and thus riskier has a great potential for high returns. On the contrary, the beta with a lower value is less risky but has low returns. 4.0 Conclusion The portfolio is a collection of securities with the aim of diversifying the systematic risk as proposed by the portfolio theory. The portfolio analysis is essential in evaluating the investment decision for different investors depending on their perceived risk attitude. The portfolio analysis is part of and parcel of managerial functions in maximizing shareholders’ wealth goals and thus demands well-informed choices. Therefore, strategic decisions in portfolio evaluation need focus and necessitates development and mapping for strategic portfolio change. The portfolio of projects consisted of projects and other related work in strategic implementation. These projects contribute to the organization of their mission and vision. Projects the projects’ portfolio was a priority based on their strategic importance, financial benefits, types of projects, the complexity of the project, the level of risk, and resource requirements. The Necessary project decision is essential and should be accepted, based on a separate adoption in accordance with the policy approval group before its implementation. These results can be used in further studies and improve the effectiveness of the portfolio. Therefore, a portfolio was created which will bring a real profit. Estimating the effectiveness of a particular portfolio includes a periodic determination of execution and implementation of the portfolio, taking into account cash flows received and the accompanying risk as evaluated with respect to the investor’s risk attitude.

References

Bradfield, D. (2003). Investment Basics XLVI. On estimating the beta coefficient. Investment Analysts Journal, 32(57), 47-53. Mangram, M. E. (2013). A simplified perspective of the Markowitz portfolio theory. Global Journal of Business Research7(1), 59-70. Author I need help with investment management assignment? worry no more. Alen Owen is an investment management assignment writer with advanced skills in portfolio construction and analysis and performance measurement. This portfolio management assignment solution was done by Alen Owen with assistance of financial analysis essay writers. Why struggle

Latest 40 Nursing EBP Project Ideas

Latest 40 Nursing EBP Project Ideas

Evidence-based practice in nursing has become vital to improving the quality of care provided to patients. Incorporating evidence-based practice into nursing significantly improves patient outcomes and patient, family, and healthcare provider satisfaction. On the other hand, it can reduce costs and the risk of maltreatment by cutting down on avoidable tests and procedures.


What is Evidence-based Practice in Nursing?

Evidence-based Practice (EBP) is an approach to healthcare that utilizes up-to-date research available to improve patient health and safety to reduce overall cost and variability in health outcomes. EBP can also be described as a problem-solving approach to the delivery of health care with the integration of the best evidence from well-designed studies and patient care data while combining it with patient preferences, values, and nurse expertise.


expert writing help


Process of Implementing Evidence-Based Practice in Nursing

Evidence-based practice has seven steps, which are numbered from zero to six. So, here is a brief overview of each step in the EBP process.

Step Zero: Cultivate a Spirit of Inquiry

To cultivate the spirit of inquiry, you must ask curious questions. For instance: in patients with head trauma, how does supine positioning compared with elevating the head of the bed 30 degrees affect intracranial pressure? By asking this kind of question, you lay the foundation for EBP. Without this spirit of inquiry, the successful steps in the EBP process won’t follow.

Step 1: Ask Clinical Questions in PICOT Format

Inquiries in the PICOT format take into account the patient population of interest (P), intervention (I), comparison intervention or group (C), outcome (O), and time (T). The PICOT format offers an efficient framework for searching electronic databases designed to retrieve articles only relevant to the clinical question. Taking the rapid response teams as an example, you can frame a question about whether the use of such teams will result in positive outcomes as follows: “In acute care hospitals (P), how does having a rapid response team (I) compared with not having a response team (C) affect the number of cardiac arrests (O) during four months (T).

Step 2: Search for the Best Evidence

The PICOT format offers the best way to search for evidence to inform clinical practice. For instance, if a nurse, in the rapid response case we used above, types “what is the impact of having a rapid response team?” into the search field of a database, she or he will have several abstracts, most of them irrelevant.

If the PICOT format is used, it will help identify the keywords or phrases that, if typed and combined well in the search engine, will find all the relevant articles for the question. In the PICOT question on rapid response teams, the key phrase to fill into the database search field would be acute care hospitals. This is a common subject that will yield thousands of citations and abstracts.

The second phrase to search would be rapid response team, then cardiac arrests, and the other remaining terms in the PICOT question. Lastly, combine the results of the searches for each of the terms to narrow the results to articles pertinent to the clinical question. Also, it helps to set limits on the final search.

Step 3: Critically Appraise the Evidence

Now that you have a selection of articles for review, you must appraise them to determine which ones are the most relevant, valid, reliable, and applicable to your clinical question. In this process, use the following three critical questions:

  • Are the results of the study valid? The question of validity is founded on whether the research methods are thorough enough to render findings as close to the truth as possible. Did the scholars randomly assign subjects to treatment or control groups and ensured shared key characteristics before treatment? Were valid and reliable tools used to measure key outcomes?
  • What are the results and are they important? For purposes of intervention, the question of study reliability addresses if the intervention worked, its impact on results, and the possibility of getting similar outcomes in the nurses’ practice settings. In qualitative studies, however, the question of reliability includes determining whether the research approach fits the purpose of the study, as well as other aspects of the research such as whether the results can be confirmed.
  • Will the results help me care for my patients? The question of study applicability covers clinical considerations such as whether subjects in the research are the same as one’s own patients, whether the benefits outweigh the risks, feasibility and cost-effectiveness, and patient values and preferences.

Step 4: Integrate the Evidence with Clinical Expertise and Patient Preferences and Values

Certainly, research evidence by itself is not enough to justify a change in practice. Clinical expertise, based on patient assessments, laboratory data, data from results management programs, and patient’s preferences and values are critical elements of evidence-based practice. Since there is no clear-cut formula for how to weigh each of these elements, the implementation of EBP is highly influenced by institutional and clinical variables.

For instance, there is evidence indicating reduced incidences of depression in burn patients if they get eight sessions of cognitive-behavioral therapy before hospital discharge. You what your patients to receive the therapy up to the eighth session and so do they. However, the budget constraints your hospital experiences hinder it from hiring therapists to provide this treatment. So the resource shortage deters enactment of the evidence-based practice.

Step 5: Evaluate the Outcomes of the Practice Decision or Changes Based on the Evidence

Once an EBP is implemented, it is vital to monitor and evaluate any changes in outcomes to ensure positive effects are supported and negative ones remedied. Remember that because an intervention was successful in a thoroughly controlled trial does not imply it will equally be effective in the clinical setting.

Monitoring the effect of an EBP change on the health care quality and outcomes will help nurses spot flaws in application and identify the most precise way most patients can benefit. If the outcomes diverge from those reported in the research literature, monitoring will help find out why.

Step 6: Disseminate EBP Outcomes

nursing ebp project ideasNurses can attain excellent outcomes for their patients through evidence-based practice, however, they often don’t share their experiences with fellow nurses in their own or other healthcare facilities. This leads to pointless replication of efforts and propagates clinical approaches that aren’t evidence-based.

One of the best ways to disseminate successful initiatives of EBP is by doing EBP rounds in your institution, presenting at local, regional, and national conferences, and reporting in peer-reviewed journals, publications, and professional newsletters.

Undoubtedly, the application of EBP in nursing has significantly increased in different hospitals and healthcare centers worldwide. Evidence-based practice project ideas offer a great way to gain valuable knowledge and practice while providing patient care. Furthermore, EBP offers an opportunity to help nurses by contributing to global healthcare.

Some of the most pressing evidence-based practice project ideas concern medical surgery, geriatrics, midwifery, and management and leadership in nursing. Need some inspiring topics for your upcoming nursing EBP project? Look no further! Here are 40 nursing EBP project ideas you can consider in your nursing evidence based practice paper.


Latest 40 Nursing EBP Project Ideas You Can Use in your DNP Journey

As a DNP student, you will be required to develop EBP project to demonstrate your skills to translate evidence into practice and communicate outcomes. Our non exhaustive list of innovative EBP project topic idea should be your first landing before you can start writing your project. Our top DNP project writers have prepared a latest 40 nursing EBP project ideas you can use in your DNP proposal

  1. Senior nurses and attitude towards the application of evidence-based practice care solutions – a primary investigation
  2. Evidence-based nursing practices for the disabled in inpatient settings in the US – literature review
  3. Selection of treatment procedure through evidence-based practice – an analysis of nursing care
  4. Evidence-based support for Continuing Professional Development requirements in nursing education – analysis of literature
  5. Mental health nursing – perspectives from evidence-based practice in the US
  6. Is care quality improved through evidence-based nursing? An investigation
  7. A systematic investigation of the relationship link between nursing education and professional excellence in the US
  8. Nursing staff screening and recruitment – an evidence-based approach
  9. Why is evidence-based nursing and care highly recommended? An explorative analysis
  10. A critical appraisal of the challenges in the implementation of evidence-based practice in nursing in the US
  11. An analysis of the practical implications of the theoretical foundations for evidence-based nursing practice in the US
  12. Safety precautions for patients with dementia in inpatient settings in the US based on evidence-based practice – review of literature
  13. Catering to patient preferences through the evidence-based nursing approach – an analysis from the US
  14. How do practitioners evaluate evidence-based nursing practices? An investigation
  15. Tracing the historical context of evidence-based practice in nursing in the context of current achievements
  16. What do nursing students think about evidence-based practice in nursing? A qualitative study
  17. Palliative care in inpatient settings – a review of evidence-based practice perspectives in the US
  18. Addressing the implementation gap between knowledge and practice in evidence-based nursing in the US
  19. What is the impact of nursing leadership styles on the synthesis of evidence-based practice in Cardiac ICUs in the US? A primary exploration
  20. The use of social media applications for the provision of evidence-based nursing care in the US – an investigation
  21. What is the role of evidence-based practice in promoting collaborative decision-making in ICUs in the US?
  22. A systematic review of the specialized evidence-based nursing practice models in the US and the UK
  23. Evidence-based nursing evaluation and practice as an integral part of nursing education – a review
  24. How do nurses translate evidence base into actual practice? A qualitative exploration of the quantity and quality of theoretical evidence translated into practice in the US
  25. How relevant are PICOT guidelines in evidence-based nursing evaluations and practice care solutions? Review of literature
  26. How do nurses define safety in practice – an evidence-based care approach
  27. The evidence base for sexual abuse in developed and developing countries – a literature review
  28. Evidence-based nursing in real-world contexts – an analysis
  29. Is the evidence-based practice of a health concern universal or does it differ according to co-related determinants? An Investigation through peer-reviewed literature
  30. What do nursing students think about evidence-based practice in nursing? A qualitative study
  31. The collective knowledge of a nursing department based on evidence-based practice – how often does this happen?
  32. Antibacterial foam dispenses effectiveness compared to simple washing of hands with water and soap in nursing units
  33. Does the historical evidence point to the efficacy of analyzing evidence-based practice for nursing studies? A review
  34. What is the best way to write a systematic review to maximize the efficacy of evidence-based practice? Insights from literature
  35. Is evidence-based nursing effective in sharpening nurses’ critical thinking skills? Qualitative guidelines
  36. Effects on oral contraceptives, especially on weight gain
  37. NCLEX: When should you perfectly take it
  38. How do nurses use evidence-based practice for self-care?
  39. Professional wisdom or educated guidelines? An analysis of the impact of evidence-based practice on nurse care delivery in the US
  40. Nursing theories learned in nursing school: Are they applied in practice

Conclusion

Without a doubt, there are several great nursing EBP project ideas to choose from. So, figure out what works best for you and create a winning EBP project for your DNP. You can present the outcomes to your fellow nurses or publish your results in a nursing journal article for the rest of the nurses worldwide to read and practice.

Besides, if you are looking to get help with Nursing EBP project writing, don’t hesitate to place an order with us

expert writing help

How to Write Case Study Assignment

How to Write Case Study Assignment

A case study is an academic assignment that asks specific questions about issues, problems, or situations to help a professional or student identify and analyze the issues or problems in the given situation. It also offers suitable responses, preventative measures, or solutions to the problem or issues. A case study also requires the student to incorporate theoretical knowledge to solve the problem or issue arising from the situation.

Writing a case study assignment requires intensive investigation of the issue or problem, examination of all available alternative solutions, and giving recommendations for the most effective solutions to the problem based on evidence. If you want to write a successful case study, then be sure to have all the relevant materials and sources for the assignment.

Types of Case Studies

You may encounter different case study assignments as a university or college student. However, these different case studies depend on the subject or field you are pursuing. These are the most popular case studies you may encounter:

  • Descriptive Case Studies: These case studies describe a case to help others understand the problem or issues examined. These case studies are mainly used as a research method.
  • Cumulative Case Studies: These case studies require students to collect data and information from different sources at different times. They are common in qualitative research and are a method of data analysis to prevent avoidable new investigations.
  • Exploratory Case Studies: These are often used as outlines for more extensive research studies. These case studies will inform you why you might need large-scale research or not. These case studies are usually used in the social sciences and concentrate mainly on real-life cases.
  • Intrinsic Case Studies: Intrinsic case studies aim to provide in-depth research on case questions. It also allows for case study analysis by addressing what is available. The main focus in this type of case study is focusing on the subject and limiting the exploration of that particular case.
  • Instrumental Case Studies: These study cases are designed to address the components of the study through the use of student materials as the tool or instrument that leads to scientific evidence. Still, you will have to explain your outcomes.

Now that you understand the different types of case study writing, it will be easier to understand the step-by-step writing process.

A Steps-by-Step Case Study Writing Process

A case study assignment can prove challenging, especially when you need help figuring out where to start. However, below are steps to follow to get started!

Read the Case Study Questions and Understand

Before you start writing your case study, read the case study and the associated questions carefully. Identify the main issues, problems, or points of the case study. Analyze the questions to find out what they require you to do. Revisit the case study topic and link the relevant information to each question asked.

Determine the Issues or Problems in the Case Study

Case studies describe a scenario that may arise in a specific social context or field of study, thus involving many people in complex situations. Therefore, case studies will describe a problematic scenario, possibly in how it is handled or its intricacy. However, it is essential to analyze the scenario and determine the problem or actions described in the case that may be problematic.

Connect Theory to Practice

Utilize your knowledge of the current codes or practices, theories, or other scholarly documents and behaviors to determine what was done correctly and what was not. For instance, determine whether appropriate interviewing techniques were used or if people were interviewed in your case study.

Plan your Answer

Consider using the questions you set as your guidelines to answer each section of your case study. That way, you reduce the chance of forgetting the set question. You can then remove the heading before you submit your document for grading.

Begin Writing Your Case Study

Up to this point, you have everything you need for your case study. So, it is time to put it down on paper. Ascertain that your case study writing process is founded on the data and information gathered during preparation.

Introduction

Make the introduction as clear to your reader as possible what topic you intend to discuss and how you intend to discuss it. If you have carefully read the questions, understood them, and researched and planned your answers, you will have a clear idea of what you will write.

Allow your introduction to transition from general to specific information. Most importantly, let the last sentence of your introduction be a thesis statement, and it should bring out what readers expect in a clear and precise manner.

Body Paragraphs

The body paragraphs are where you discuss the case study. Depending on the number of questions you have set and how much discussion is involved in answering each question, decide on the number of paragraphs required.

Ideally, use four paragraphs to exhaustively discuss a complex question and one paragraph for a fundamental question. However, you need to have one main point for each paragraph. Consider including headings to clarify your answers while avoiding repetition or rambling. Bear in mind your total word count for your case study while you write. You can divide your body section as follows:

Background Information

When writing a case study assignment, you must include background information and an excellent panoramic view of the issue or problem you intend to cover.

Presentation of Data

In case study writing, actual data must be presented. Including actual data will add credibility to the case you are trying to solve. Data can be derived from the questionnaires and interviews you conduct. Therefore, let the reader know what you learned from the questionnaires and interviews about the issue, its development, existing solutions, and expected outcome.

Possible Solutions

Be sure to provide the possible solutions for the case; you must provide the case itself along with the case solutions. For instance, you can refer to some of the statements by the respondents from your interview. The idea here is to give the reader a complete understanding of the issue or problem. Also, make recommendations on the possible solutions for the problem or issue under discussion.

Conclusion

Essentially, your case study conclusion should summarize all of the main points covered in the body paragraphs without introducing new ideas that need to be covered in the body. More importantly, make your conclusion as conclusive as possible.

Referencing

Since a case study assignment is academic, adding references is very important. This is because references add credibility. So, use reliable referencing to make your case study credible, especially if you’re borrowing ideas from other authors.

Edit and Proofread Your Case Study

When you are done writing your case study, you need to edit and proofread your document. Correct any spelling inconsistencies, grammar mistakes, punctuation errors, and sentence structure, and ensure there is a smooth flow from one sentence to another. Most importantly, it ensures coherence and the transition of ideas from one paragraph to another.

Submit

If you are satisfied that your case study assignment document demonstrates that, if you were a professional handling that specific issue or problem, you would know the kind of procedures and policies to be followed or the actions to be taken to handle the problem professionally, then you can submit it for grading.

What to do to Improve your Case Study Assignment

Use relevant, trustworthy data or references.

A good case study must have trustworthy and reliable data and information. Case study assignments should always appeal to real situations. Therefore, use objective evidence and data to strengthen your assignment. If you can obtain actual data, consider using data that is as close to the real thing as possible.

Use a Clear and Easy Writing Style

Consider using a simple, easy, and involving writing style to catch your readers’ attention. Remember that formatting plays a more significant role in your case study assignment than you can imagine. Reading a long text with no heading, bolded text, graphs, bullet points, etc. can be monotonous. Therefore, make your case study assignment more readable and attractive by using these formatting methods wherever suitable.

Conduct the Research

When writing a case study assignment, always start by researching extensively and collecting as much information and data as possible about the case. That way, you will have a better understanding of the case. Also, gather reliable and trustworthy sources, ideally from journal articles, interviews, videos, and presentations.

Once you have all the information and data, analyze it and determine the essential facts for your case study topic. Develop an outline so that you have a straightforward plan to follow during writing.

Final Thoughts

At this point, you now know how to write a case study. However, if you experience any challenges in completing your case study assignment, you can avail of our case study assignment writing help. We are a top-rated case study assignment writing company with the trust and credibility to help students write exceptional case study assignments!